Every garment starts as a flat roll of cloth. Before a single stitch is sewn, someone has to cut that cloth into hundreds of exact shapes. This job belongs to the cutting department. It is small compared with the sewing floor, but it carries a big share of the cost, because fabric is usually the largest part of a garment’s price. A mistake here cannot be repaired later. If a panel is cut wrong, the fabric is gone.
This guide explains the cutting department in the garment industry in simple terms. You will learn what it does, the flow of work, the machines, the people and the key measures such as marker efficiency and fabric wastage. A worked example shows the numbers for a real order. For a standard operating procedure, see our page on the cutting section SOP, and for the flow, our flow chart of the garments cutting section.
What does the cutting department do
The department turns fabric rolls into cut parts that are ready for sewing. Its main duties are:
- Receive fabric from the warehouse and check it against the order
- Plan how much fabric is needed, using consumption and markers
- Relax the fabric if needed and lay it in layers (spreading)
- Cut the layers to the pattern shape
- Number, sort and bundle the cut parts
- Check quality and replace faulty parts
- Send the bundles to sewing or to printing and embroidery first
- Keep records of fabric used, wasted and returned
- Control fabric cost, since cutting decides how much cloth the garment uses
Why the cutting department matters
Fabric makes up a large share of the cost of most garments. In the costing example in our guide on how to calculate product cost, fabric was about 62 percent of the selling price. A one percent saving in fabric use can pay for a lot of other improvements. At the same time, cutting sets the quality for the sewing line. Parts that are the wrong size, shade or shape cause problems downstream.
Flow of work in the cutting department
- Fabric receiving and inspection. Rolls arrive with a packing list. The store checks width, length, weight and shade, and inspects a sample of rolls for defects. See our guide on fabric inspection and the 4-point system.
- Fabric relaxation. Knit fabric is left unrolled for several hours, often 12 to 24, so that it can relax and the tension from the roll is released. This reduces shrinkage and distortion later.
- Marker planning. A marker is a paper or digital layout that shows how pattern pieces fit on the fabric width. Software helps place pieces for the best use of fabric.
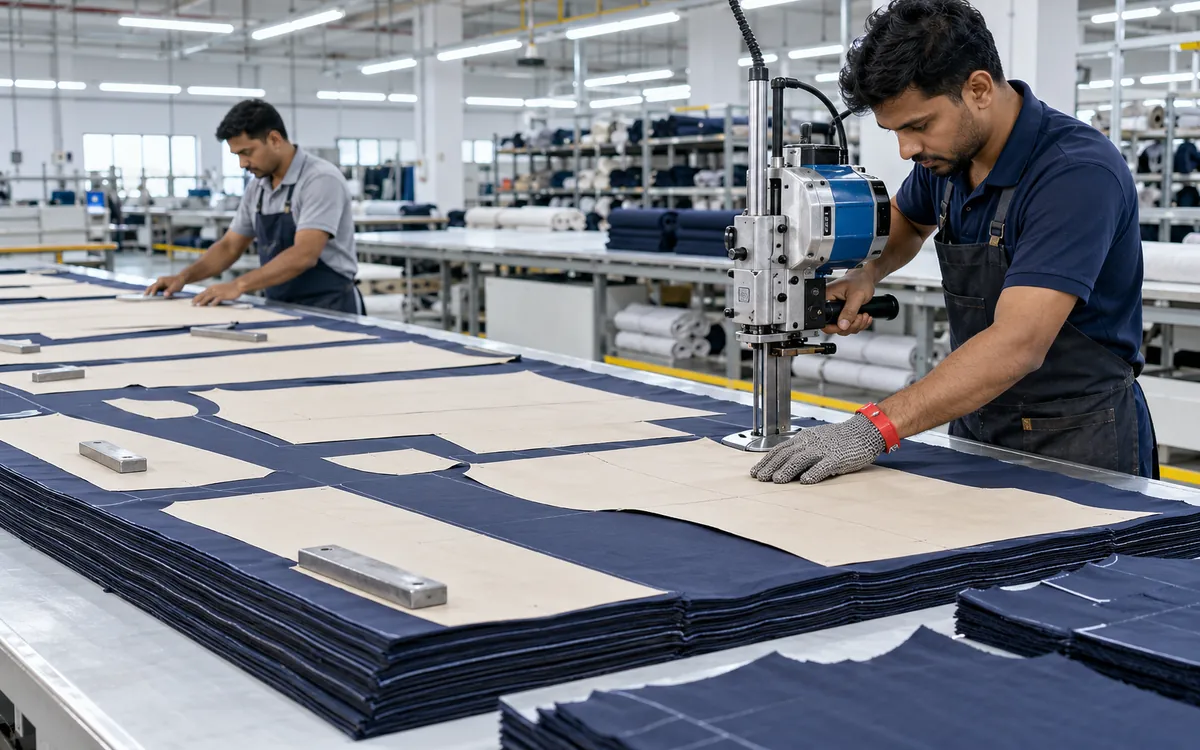
- Spreading (laying). The fabric is laid on a long table in layers, called plies, to the planned length. This can be done by hand or by a spreading machine.
- Marker placing. The marker is put on top of the lay and secured.
- Cutting. Cutters follow the marker lines with a knife machine or an automatic cutter.
- Notching and drilling. Marks are made for alignment and for pockets or darts.
- Numbering and ticketing. Each part gets a sticker with the lot, size and ply number. This keeps parts from the same ply together, so there is no shade difference in a garment.
- Sorting and bundling. Parts are grouped by size, colour and style into bundles, often of 10 to 30 pieces.
- Quality check. Inspectors check cut parts against the pattern, and count pieces.
- Handover. Bundles go to sewing, printing, embroidery or washing, as per the plan.
For more detail on the sequence, read our page on the process sequence of fabric cutting.
Key terms
| Term | Meaning |
|---|---|
| Marker | A layout of pattern pieces for one or more sizes on the fabric width |
| Marker efficiency | Share of the marker area covered by pattern pieces |
| Ply | One layer of fabric in the lay |
| Lay | The stack of plies on the table |
| Spreading | Laying fabric in plies |
| End allowance | Extra length at each end of the lay |
| Consumption | Fabric needed per garment |
| Cut plan | The plan showing sizes, colours, lays and quantities |
| Cutting wastage | Fabric not used in garments |
| Bundle | A group of cut parts of the same size and ply range |
Machines in the cutting department
| Machine | Use |
|---|---|
| Spreading machine | Lays fabric in plies with even tension and alignment |
| Straight knife cutter | The most common hand-held cutter for multi-ply cutting |
| Round knife cutter | Cuts straight lines and gentle curves in fewer plies |
| Band knife machine | Cuts small, accurate parts from blocks of fabric |
| Automatic cutting machine (CNC) | Cuts according to a digital marker with high accuracy |
| Die cutting press | Cuts repeated shapes using steel dies |
| Fusing machine | Bonds interlining to cut parts |
| Drilling and notching machine | Marks the cut parts |
| Fabric inspection machine | Checks fabric for defects |
| Relaxation tables or racks | Hold fabric during relaxation |
| Plotter and CAD system | Make markers and patterns |
| Ticketing or sticker machine | Prints numbers for parts |
For a comparison of cutting systems, read our guides on automatic and manual fabric cutting machines and on straight, round and band knife machines.
People and roles
| Role | What they do |
|---|---|
| Cutting manager | Runs the department, plans cutting and controls fabric use |
| Cutting in-charge or supervisor | Manages the daily work and the crew |
| Marker maker or CAD operator | Prepares patterns and markers |
| Spreader | Lays the fabric |
| Cutter | Cuts the lay |
| Numbering and sorting staff | Mark, number and bundle parts |
| Quality checker | Inspects cut parts |
| Store keeper | Issues fabric and takes back leftover fabric |
| Maintenance technician | Keeps the machines in good order |
A clear plan and a good handover between roles reduce confusion, errors and lost fabric.
Worked example: marker efficiency and fabric needed
A factory plans to cut 6,000 knit T-shirts. The fabric is 1.6 metres wide, with a weight of 180 GSM.
The marker
- The marker carries 6 garments in one set of sizes
- Marker length: 2.40 metres
- Marker width: 1.60 metres
- Area of all pattern pieces in the marker: 3.30 m²
Marker efficiency
- Marker area = 2.40 × 1.60 = 3.84 m²
- Efficiency = 3.30 ÷ 3.84 × 100 = 85.9 percent
Fabric per ply
- End allowance: 2 cm at each end of the ply, so 4 cm in total
- Ply length = 2.40 + 0.04 = 2.44 metres
- Fabric area per ply = 2.44 × 1.60 = 3.904 m²
- Fabric use = 3.30 ÷ 3.904 × 100 = 84.5 percent
- Wastage = 100 − 84.5 = 15.5 percent
Plies and fabric for the order
- Each ply makes 6 garments
- Plies needed = 6,000 ÷ 6 = 1,000
- Fabric length = 1,000 × 2.44 = 2,440 metres
- Add 1.5 percent for end-of-roll waste and sample loss = 2,440 × 1.015 = 2,476.6 metres
- Fabric weight = 2,476.6 × 1.6 × 0.180 = 713.3 kg
Consumption per garment
- 713.3 ÷ 6,000 = 0.119 kg, or about 119 g per T-shirt
What if the marker improves by 1 point?
If the marker efficiency rises from 85.9 to 86.9 percent, the marker length drops to 3.30 ÷ (0.869 × 1.6) = 2.373 metres. The ply length becomes 2.413 metres.
- Fabric = 1,000 × 2.413 × 1.015 = 2,449.5 metres
- Saving = 2,476.6 − 2,449.5 = 27.1 metres, or about 7.8 kg of fabric (27.1 × 1.6 × 0.180)
For a single order, that is small. Over a year of many orders, one point of efficiency is worth a lot. This is why cutting managers watch markers closely. Note that marker efficiency is limited by the shapes of the pieces and the fabric pattern, so there is a point beyond which gains are not possible.
Key performance measures
| KPI | Formula or meaning | Why it matters |
|---|---|---|
| Marker efficiency | Pattern area ÷ marker area × 100 | Shows how well pieces nest |
| Fabric utilisation | Pattern area ÷ total fabric area used × 100 | Includes end allowance and waste |
| Cutting wastage % | 100 − utilisation | Direct cost |
| Consumption per piece | Fabric used ÷ pieces cut | Costing check against estimate |
| Cut-to-ship ratio | Pieces shipped ÷ pieces cut | Shows losses in the whole chain |
| Cutting productivity | Pieces cut per person per day | Workload and cost |
| Cutting rejection % | Faulty parts ÷ total parts | Quality of cutting |
| Fabric returned vs issued | Balance of leftover fabric | Control |
| Shade-lot mixing incidents | Count | Quality risk |
| Order cut on time | % of orders cut by plan date | Supports sewing |
Common problems and fixes
| Problem | Cause | Fix |
|---|---|---|
| Shade variation in a garment | Parts from different rolls or plies mixed | Number plies, bundle by ply and keep roll shade lots together |
| Wrong size parts | Pattern or marker error, cutting off line | Check patterns, verify markers, train cutters |
| Bowing or skewing | Uneven spreading tension, bad fabric | Relax fabric, spread without stretching |
| Frayed or ragged edges | Dull knife | Sharpen and maintain knives |
| Fusing marks | Wrong heat or pressure | Test settings |
| Excess fabric use | Poor marker, wrong width, spread loss | Use CAD nesting, check fabric width on arrival, reduce end loss |
| Missing parts | Count errors | Count after cutting, check in bundles |
| Fabric defects in parts | Poor inspection | Mark defects during spreading and avoid them in the marker |
| Delay in cutting | Late fabric, machine breakdown | Plan ahead, keep spares, track fabric receipt |
| Fabric left unaccounted | Poor records | Issue and return forms, weekly audits |
For quality ideas, see our page on the quality control of the garments cutting section and the guide to fabric warehouse and cutting section best practices.
Good practices
- Check fabric width and shade on arrival. A mismatch changes the marker.
- Relax knit fabric before cutting, for the time recommended by the buyer or lab.
- Plan the cut early. The cut plan should match the order, sizes and colours.
- Use digital markers where possible, and keep a library of markers for repeat orders.
- Spread with even tension, with edges aligned.
- Limit ply height to what the cutter can control. Very tall lays reduce accuracy at the bottom.
- Keep knives sharp and machines in good order.
- Number every ply, and bundle with care.
- Count and check before handover.
- Return leftover fabric with a record, and report waste weekly.
- Train staff and share targets, so everyone knows what a good day looks like.
- Link cutting to sewing. Keep the sewing line fed, but do not cut far ahead of demand, because stock between departments hides problems. See our guide on target vs actual production to see how shortfalls in cutting affect the sewing line.
Safety in the cutting room
- Use cut-resistant gloves when handling knives
- Fit guards and keep them in place
- Keep floors clear of fabric scraps and fluff
- Keep walkways free for rolls and trolleys
- Check electrical cables and plugs
- Train staff to lift rolls safely or use trolleys
- Keep fire extinguishers close and clear of blockages
- Wear masks where fabric dust is high
Final thoughts
The cutting department in the garment industry is small in size but large in impact. It controls the biggest cost, shapes quality and feeds the sewing floor. Plan markers carefully, spread and cut with discipline, number every ply and track a few simple measures such as marker efficiency, wastage and consumption. Those habits protect margins on every order.
Frequently asked questions
It is the section that cuts fabric into garment parts after spreading, according to patterns and markers, and prepares them for sewing.
A marker is a layout of all pattern pieces on a sheet that fits the fabric width. Cutters use it as a guide for cutting.
It is the percentage of marker area covered by pattern pieces. A higher number means less fabric waste.
Knit fabric stretches on the roll. Relaxation lets it return to its natural state, which reduces shrinkage and size changes after cutting.
Spreading machines, straight and round knife cutters, band knives, automatic CNC cutters, fusing and marking machines.
It depends on the garment and fabric. Many knit basics see 10 to 15 percent, and complex shapes or patterned fabric can be more. Track your own numbers by style.
So that all parts from the same ply are sewn into the same garment. This avoids visible shade differences.