A pattern maker draws one pattern in one size, usually a medium. The buyer then asks for sizes from XS to XXL. Nobody wants to draw every size from scratch. So the pattern is made bigger and smaller by fixed amounts. This process is called pattern grading, and it is one of the most useful skills in a garment factory.
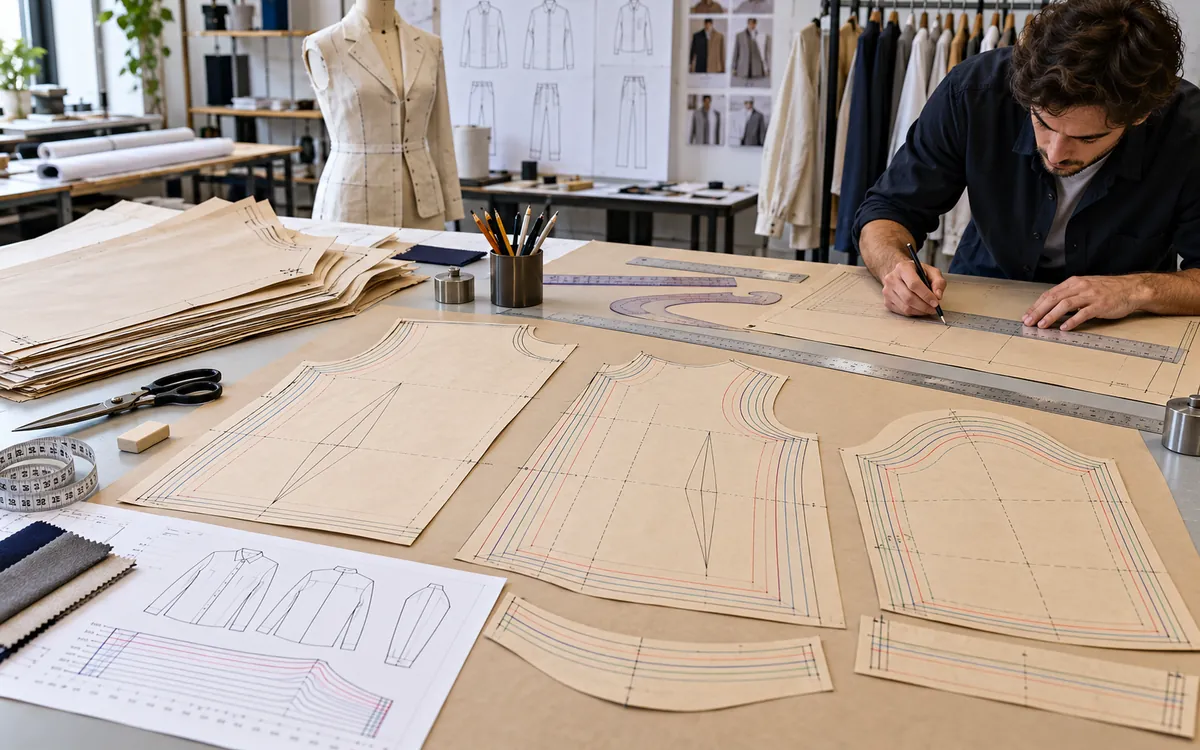
This guide explains what pattern grading is, how grade rules work, how manual and CAD grading differ and how to do a worked example. It also lists common errors and how to avoid them. If you are new to patterns, read our overview of pattern making in garments first.
What is pattern grading
Pattern grading is the process of making a set of patterns in different sizes from one base pattern. The base size is also called the sample size or the master pattern. Each new size is made by moving the pattern edges outward or inward by a set amount. The shape stays the same, but the measurements change.
Grading is not the same as enlarging a pattern on a photocopier. If you scale a pattern evenly, the neck, the armhole and the sleeve all grow by the same percentage. Real bodies do not change this way. A person who is one size bigger has a wider chest, but the neck is only a little wider and the shoulder is only a little longer. Grading follows these body changes.
Why grading matters
- It saves time. One good base pattern becomes a full size range.
- It keeps the fit and style the same across sizes.
- It supports consistent quality, so a large looks like a scaled-up medium.
- It helps the factory plan fabric, markers and cutting.
- It lets a brand sell to more customers.
A poor grade shows up fast. The medium fits well, but the XL has a tight armhole, or the XS has a sleeve that is too wide. Buyers see these faults at fit sessions and reject the sizes.
Key terms
| Term | Meaning |
|---|---|
| Base size | The size the master pattern is drawn in |
| Grade rule | The amount a point moves from one size to the next |
| Grade increment | The difference in a body measurement between sizes |
| Grading point | A corner or key point on the pattern where the rule is applied |
| Size set | The full range of sizes, such as S, M, L, XL |
| Nested pattern | All sizes drawn on top of each other to check the shape |
| Cross grade | Grading in the width direction |
| Length grade | Grading in the length direction |
How grade rules work
Every point on the pattern has an X movement and a Y movement. X is the horizontal movement, across the pattern. Y is the vertical movement, up and down the pattern. A grade rule says how many millimeters a point moves in X and in Y for each size step.
Take a simple example. The chest line of a T-shirt body grows by 4 cm in total from one size to the next. A T-shirt body has a front and a back, and the pattern is drawn as half, so the half-chest grows by 1 cm per side. The side seam point at the chest then moves 1 cm outward in X for each size up and 1 cm inward for each size down.
The rule also has a direction. When going up a size, the point moves away from the center line. When going down, it moves toward it.
The sizing rules come from a size chart
Grade rules do not come from the pattern maker’s guess. They come from the size chart. The buyer’s tech pack usually gives a measurement table with each size and a tolerance. The difference between one size and the next in the table is the grade increment. The pattern maker then splits that increment across the points that make up the measurement. For help reading a chart, see our guide on the measurement of top and bottom garments and the measurement of a T-shirt.
If the buyer does not give a size chart, use a known body measurement standard for the target market. Sizes differ between regions, so check which one applies.
Worked example 1: T-shirt body
Here is an illustrative size chart for a men’s crew-neck T-shirt. These numbers are examples, not a standard. Your buyer’s spec decides the real values.
| Measurement (cm) | S | M | L | XL |
|---|---|---|---|---|
| Chest (1/2 width) | 51 | 54 | 57 | 60 |
| Body length | 69 | 71 | 73 | 75 |
| Shoulder width | 43 | 45 | 47 | 49 |
| Sleeve length | 20 | 21 | 22 | 23 |
| Neck width | 17 | 17.5 | 18 | 18.5 |
The base size is M. The grade increments are:
- Chest: 3 cm per size
- Body length: 2 cm per size
- Shoulder: 2 cm per size
- Sleeve length: 1 cm per size
- Neck width: 0.5 cm per size
Now we split each increment across the pattern points.
Chest. The pattern is drawn as a half, so a half-chest growth of 3 cm is already the half measurement. The side seam moves 3 cm outward at the chest line. But the armhole also grows, so we usually share the move. A common split gives about 2.5 cm to the side seam and 0.5 cm to the shoulder and armhole area, depending on style. The shares depend on the design.
Length. The 2 cm length growth is split between the area above the chest line and the area below it. For example, 1 cm may be added to the armhole depth and the upper body, and 1 cm to the lower body. The armhole depth grows by less than the length, since the shoulder-to-armhole depth does not change as fast as the body does.
Shoulder. A 2 cm increase in shoulder width means 1 cm per side when the pattern is a half. This is shared between the neck point and the shoulder tip.
Neck. A 0.5 cm total neck growth means 0.25 cm on the half pattern. This is a small move, and the neck opening must stay balanced between front and back.
Sleeve. The sleeve length grows by 1 cm. The sleeve width grows with the chest, usually by about half of the chest increment on the half pattern. The cap height changes a little, so the sleeve still fits the armhole.
After the points are moved, the pattern maker redraws the lines between them, usually as smooth curves for the neck and armhole and as straight lines for the side seams.
Worked example 2: trousers
Trouser grading is trickier because the waist, hip, thigh and inseam all change.
| Measurement (cm) | 30 | 32 | 34 | 36 |
|---|---|---|---|---|
| Waist | 78 | 83 | 88 | 93 |
| Hip | 98 | 103 | 108 | 113 |
| Thigh | 60 | 62 | 64 | 66 |
| Inseam | 80 | 80 | 80 | 80 |
| Front rise | 26 | 26.5 | 27 | 27.5 |
These are also illustrative values. In this chart, the waist and hip grow by 5 cm per size. Since a trouser pattern is drawn as separate front and back pieces, the 5 cm growth is shared. A quarter of the total circumference sits on each front and back half, so a waist growth of 5 cm means 1.25 cm per quarter piece. Thigh grows by 2 cm, so about 0.5 cm per quarter piece. Inseam stays the same in this chart, because many brands sell leg length separately. Front rise grows by 0.5 cm, so the crotch point moves down by that amount.
The waistband is graded too. Its length grows by the same 5 cm as the waist, plus any overlap. Pocket bags and facings are graded so they keep the same relation to the main panels.
Grading methods
Manual grading
The pattern maker draws or traces the base pattern on paper. Then each size is made by shifting the pattern by the grade amounts, using a ruler and a set square. The new size is drawn along the shifted points. It works for small ranges and simple styles, but it takes time and errors can creep in.
Cut and spread grading
The base pattern is cut into pieces along grade lines, then spread or overlapped by set amounts, and the outline is retraced. It suits some block patterns but can distort curves.
Nested grading
Sizes are drawn on top of each other, lined up at a fixed point such as the center front or the base line. The nest shows how the pattern grows and helps to catch errors. Each size is a different line color.
CAD grading
Most factories use CAD software to grade. The base pattern is digitized or drawn on screen. The grading points are marked, and the grade rules are entered as X and Y values. The software makes all sizes at once. CAD grading is faster, more exact and easy to change. If the buyer changes the chest increment, the pattern maker edits the rule and the sizes update.
Our guide on automatic vs manual fabric cutting machines shows how graded patterns feed the cutting room.
Step-by-step grading process
- Check the base pattern. Confirm that the master pattern fits and matches the spec. Do not grade a base that is wrong.
- Read the size chart. List the increment for each measurement.
- Mark grading points. Place points at corners and key spots, such as shoulder tip, neck point, underarm, hem corner.
- Set the grade rules. Write X and Y moves for each point and each size. Check that the sum of moves equals the increment.
- Apply the rules. Move the points by hand or in CAD.
- Redraw lines. Connect the points with smooth lines.
- Nest the sizes. Check that the shapes grow evenly and no lines cross.
- Check seam lengths. The seams that meet must stay the same length in each size.
- Mark notches and grain lines. Move them with the pattern.
- Verify the measurements. Measure the finished pattern against the size chart.
- Make a sample. Cut and sew at least the smallest and largest size and fit them.
Checking seam lengths
This step catches many errors. Two seams that join must match in length. For example, the sleeve cap has to match the armhole, with a small allowance for ease. After grading, measure both and compare. If the armhole grew by 1.2 cm and the sleeve cap by 0.4 cm, the sleeve will not fit and will pucker.
Common grading errors
| Error | Result | Fix |
|---|---|---|
| Enlarging by a single percentage | Neck and armhole too large in big sizes | Use body-based grade rules |
| Moving points in only one direction | Distorted shape | Apply both X and Y moves |
| Not matching seam lengths | Puckering, twisted seams | Measure and adjust |
| Ignoring tolerance | Garments fall out of spec | Check against the spec table |
| Forgetting to grade pockets and trims | Parts fit poorly | Grade every piece |
| Uneven nest lines | Strange curves | Redraw curves |
| Using the wrong base size | Errors multiply | Confirm the base first |
| Skipping fit checks | Faults found late | Sample extreme sizes |
Grading and fabric shrinkage
Grading happens after the base pattern is set, and the base pattern should already include any shrinkage allowance. If the fabric shrinks 3 percent in width, each size needs the same correction. See our guide on pattern making based on fabric shrinkage. If you add the allowance only to the base size, the other sizes will come out slightly off, because larger sizes shrink by a larger absolute amount.
Here is a quick check. A 60 cm half chest at 3 percent shrinkage needs 60 ÷ 0.97 = 61.9 cm, which is 1.9 cm more. A 51 cm half chest needs 51 ÷ 0.97 = 52.6 cm, which is 1.6 cm more. The allowance differs by size, so grade the finished size chart first, then apply the shrinkage correction to every size.
Grading for different body shapes
Some brands make petite, tall, plus and maternity ranges. Each has its own base and grade rules, because the body proportions differ. A plus size is not just a larger regular size. The bust, waist and hip relation changes, and so does the back width and the armhole. Using a regular grade on a plus range gives poor fit.
Grading and the cutting room
Once the sizes are graded, the patterns go to the marker maker. The marker layout fits all sizes of one style on the fabric with little waste. Because sizes differ in area, the size mix affects fabric use. Our guide on the process sequence of fabric cutting shows what comes next.
Final thoughts
Pattern grading turns one fitted pattern into a full range of sizes. The method is simple: read the size chart, mark the grading points, set X and Y rules, apply them, redraw the lines and check the seams. The care comes in the details. Share each increment between the right points, match seam lengths, include shrinkage and sample the extreme sizes. A well-graded range makes every customer feel the garment was made for them.
Frequently asked questions
Pattern grading is making a set of patterns in different sizes from one base pattern by moving the edges by set amounts.
A grade rule is the X and Y distance a pattern point moves from one size to the next.
Scaling enlarges everything by the same percentage. Grading moves each point by a different amount, to match how real bodies change between sizes.
It is usually a middle size, such as M, but buyers can choose another. The base should be a size that has been fitted and approved.
CAD grading is faster and easier to edit, and it reduces errors in long size ranges. Manual grading works for small jobs.
Measure the pattern against the size chart, check seam lengths that join, nest the sizes and sew samples of the smallest and largest.
They come from the size chart in the buyer’s tech pack or a body measurement standard for the market.