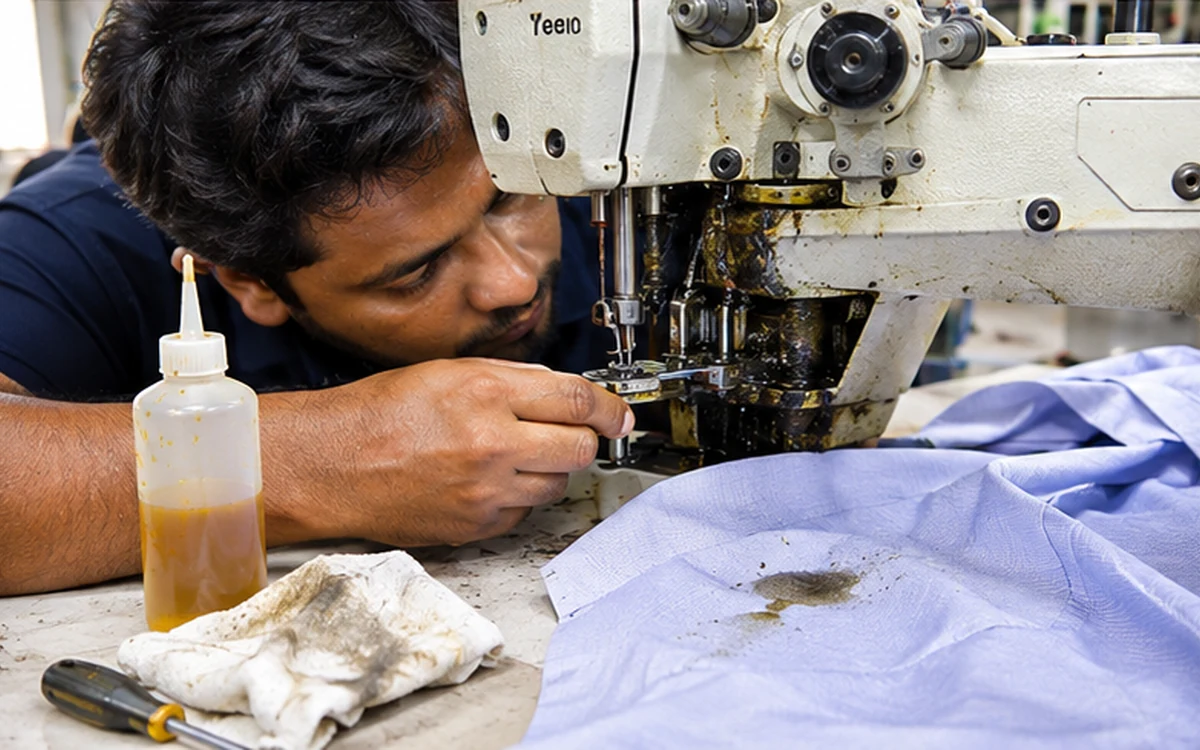
Oil stains in garments are one of the most common and most frustrating defects on a sewing floor. A small dark spot on a white shirt or a pale T-shirt is enough for a buyer to reject the piece. The stain usually comes from the machine, the floor, the hands or the tools, and it is almost always avoidable. The hard part is that nobody sees the oil at the moment it lands on the cloth, and the mark may only show after sewing, pressing or washing.
This guide explains what oil stains are, where they come from, how to find the source, how to prevent them and what to do with garments that already have them. It is written for quality teams, mechanics, and sewing and finishing supervisors.
What oil stains are and why buyers reject them
An oil stain is a greasy or dark mark on the fabric caused by machine oil, grease or another oily material. It may look like a wet spot, a shadow, a yellow or brown patch or a grey smear. It is a visible dirt defect, and most buyers treat it as a major defect when it is seen on the outside of the garment, especially on light colours.
Stains are rejected for three reasons. They spoil the look of the garment. They are hard to remove without leaving a ring or changing the fabric. And a customer who sees a stain on a new garment loses trust in the brand. Buyer rules differ, so check the defect classification for your order. See garments quality inspection.
Where oil stains come from
- Sewing machines. The most common source. Oil may drip from the needle bar, the hook area, the arm or the bed, especially after oiling or when a part is worn or leaking.
- The cutting room. Oil from cutting machines, spreading machines and the table surface.
- Floors, tables and trolleys. Oil on a table or trolley top, or on a bundle that was put on the floor.
- Hands and tools. Mechanics and operators with oily hands, and scissors, tools and cloths that carry oil from one place to another.
- Compressors and air lines. Oil in compressed air that is used for blowing, spraying or air operated machines may reach the cloth.
- Fusing and pressing equipment. Oil or dirt on the press, the belts or the rollers.
- Storage and packing. Oily cartons, shelves or trolleys, and oil on packing tables.
- Transport. Contact with oily material in a vehicle or trolley.
Most of these sources work in one of two ways. Either oil drips or sprays onto the cloth from above or below, or the cloth is carried over an oily surface by a person, a trolley or a bundle. Knowing which of the two you are dealing with makes the search much faster. A drip leaves a spot or a cluster of small dots. A contact leaves a smear or a wider patch along an edge or a fold.
A single stain on one piece is a handling problem. The same stain on many pieces is a process problem, and it usually points to one machine, one table or one habit that can be fixed once and for all.
Types of oil marks
| Type | Typical look | Common source |
|---|---|---|
| Machine oil | Clear to yellowish spot, may spread | Drip from needle bar, hook area or arm |
| Grease | Thick, dark, often a smear | Leaking joint or grease points, tool contact |
| Needle area oil | Small dots near the stitching line | Oil mist or drip near the needle |
| Hand oil | Finger marks and smudges | Dirty hands or gloves |
| Press or hydraulic oil | Dark patches, sometimes large | Pressing, fusing or hydraulic equipment |
| Floor and table oil | Smears along the edge of a piece | Dirty surfaces and bundles on the floor |
A quick diagnosis table
The place where the stain sits on the garment gives a clue about the source.
| Where the stain is | Likely source |
|---|---|
| Along the seam line, small dots | Drip from the needle area or hook |
| Near one edge only | Dirty table, trolley or floor |
| Finger shaped marks | Hands or gloves |
| Large patch on the front or back | Contact with a greasy surface or press |
| Same spot on many pieces | A fixed source, such as one machine or one point on a table |
| Stain on the inside only | Machine below the cloth, such as the feed or hook area |
| Marks in random places | Handling, storage or transport |
How to find the source
- Look at the pattern. If many stains are in the same place or from the same operation, a machine or a table is the likely source. If they are random, check handling.
- Trace by bundle. Use the bundle ticket and the operator record to see which line, machine and operator handled the pieces. See bundle ticket and bundling in a garment factory.
- Check the machine. Wipe a clean white cloth or paper under the needle, hook and arm area and see if oil comes off. Run the machine with a clean scrap and look at the result.
- Check the tables and trolleys. Wipe the surface with a clean white cloth.
- Check hands and tools. Look at the hands of operators and mechanics after they have worked on a machine.
- Check air lines. Look for oil in compressed air by blowing onto a clean paper.
- Use root cause analysis for repeat problems. See root cause analysis in garments and sewing defects and root causes.
Prevention at the machine
- Oil with care. Follow the machine maker’s manual and the factory’s schedule for what to oil and how much. Too much oil is a common cause of drips. See the sewing machine maintenance schedule and the preventive maintenance checklist for sewing machines.
- Use the right oil. Use the oil the manual recommends, and do not mix types.
- Wipe off the extra. After oiling, wipe all extra oil, and run the machine on scrap cloth before real work.
- Fit guards and drip trays. Many machines have guards or oil pans. Keep them in place and clean.
- Fix leaks. A machine that drips should be repaired, not just wiped.
- Check after repair. After a mechanic has worked on a machine, clean it and test on scrap before the machine returns to production.
- Keep the oil can away from the table. Oil cans and rags should not sit on or near cut parts.
- Include oil in the machine plan. See TPM in the garment factory.
- Check light coloured styles with extra care. Before a white or pale style starts, clean each machine, run scrap cloth and have a mechanic and a supervisor confirm that the machines are dry.
- Keep a stain log per machine. If one machine is named again and again, repair or replace the leaking part rather than wiping it every day.
Prevention in the room
- Housekeeping. Clean tables, floors and trolleys on a schedule, and before each new style.
- Keep bundles off the floor. Use trolleys, racks or clean tables.
- Cover cut parts. Use clean covers or poly sheets for bundles that wait.
- Separate the oil store. Keep oil, grease and cleaning cloths in a place away from cut parts.
- Check the compressed air. Use an oil filter and drain the air line as the maker advises.
- Clean the press and fusing machine. Wipe belts and surfaces on a schedule.
- Clean the cutting room. Keep the cutting machines and tables clean and covered when idle.
- Keep cartons and shelves clean. Check packing tables, shelves and trolleys.
Prevention at the people level
- Wash hands. Mechanics and operators should wash their hands after touching oil or grease.
- Use gloves and clean cloths where needed. Replace them when dirty.
- Separate the tools. Mechanic tools should not be used on cut parts without cleaning.
- Train everyone. Operators, helpers and mechanics should know why oil stains matter and how they happen.
- Report leaks. Operators should tell a mechanic as soon as they see oil on a machine or cloth.
- Give feedback. Show the stained pieces to the people involved, so they can see the result.
Checking for stains
- At the line. Operators should look at each piece as they work, and supervisors should check the first pieces after a machine repair.
- Inline inspection. Quality checkers look for oil marks on cut parts and sewn parts. See DHU in a garment factory.
- End of line and finishing. Check each piece in good light, front and back. See finishing quality control SOP.
- Final inspection. Include oil stains in the checklist. See garment inspection checklist and pre-shipment inspection in garments.
- Light. Good light helps. Some factories also use an ultraviolet light in a darker area to spot oil marks that are hard to see. If you use it, follow the safety instructions for the lamp.
Remember that oil stains often show only after washing or pressing, since heat and water can bring a faint mark to the surface. Check washed and pressed garments with extra care.
What to do with stained garments
- Separate them. Put stained pieces in a marked bin, so they do not go to packing.
- Record them. Note the style, line, machine and operator, to find the source. See rework in the garment factory.
- Decide the action. Depending on the stain, the fabric and the buyer’s rule, the piece may be spot cleaned, washed, or rejected.
- Test first. Before any cleaning, test the method on a spare piece of the same fabric and colour, because cleaning can leave a ring or change the colour or the hand feel.
- Follow safety rules. If a cleaning product is used, follow its safety data sheet and the factory’s chemical rules. Do not use a product the buyer does not allow.
- Check again. After cleaning, check the piece in good light, and check again after pressing or washing.
- Reject when needed. Some stains cannot be removed without damage. Those pieces should go to the second quality or reject store as the buyer’s rule says.
See best practice in garment washing for how washing may help or harm.
Final thoughts
Oil stains in garments mostly come from machines, tables, hands, tools and air lines, and they can usually be prevented. Find the source by looking at where the stain sits and tracing it back by bundle and machine. Then control the source: oil with care, wipe off the extra, fit guards, clean the tables, keep bundles off the floor and wash hands.
Check pieces in good light, and take extra care with washed and pressed garments. Treat stained pieces with a test first, follow the safety data sheet and the buyer’s rules, and reject what cannot be saved. Most important, keep records, so that the cause is fixed and does not return.
Frequently asked questions
Mostly oil drips from sewing machines, oily hands and tools, dirty tables and floors, oil in compressed air and greasy pressing equipment. Too much oiling and leaking machines are common causes.
Oil machines in the right way, wipe off extra oil, fix leaks, keep guards in place, clean tables and trolleys, keep bundles off the floor, wash hands and train the team to report leaks.
On most buyer lists, a visible oil stain on the outside of a garment is a major defect. Check the buyer’s defect classification for your order.
Sometimes, but it depends on the fabric, the colour, the type of oil and the buyer’s rule. Test on a spare piece first, follow the product’s safety data sheet and check the result after pressing or washing. Some pieces will need to be rejected.
A faint oil mark that was hard to see on dry fabric can become clear after washing or pressing, because heat and water change how it looks. So check washed and pressed pieces with extra care.
Follow the machine maker’s manual and your factory’s maintenance schedule, because it depends on the machine and the work. Too much oil is as harmful as too little.
Look at where the stains sit, trace the bundles to a line and operator, and wipe a clean white cloth or paper under the needle and hook area of the suspect machine. Then sew on scrap cloth to see if it marks.