Quality Control Manual of Garments
Every factory has its own policy to control quality to get a better product. Everything is to be written in a document; how to control quality and how to get the best quality product. For quality control, this document is known as a quality manual, which is followed by each and every company in the apparel industry. A complete quality control manual of the garments factory actually increases the effectiveness of quality control by providing guidelines to the related parties. Here in this article, you will find a complete quality control manual of a typical Garments Industry. After reading this, you will have a detail idea of a complete quality manual of a garments factory.
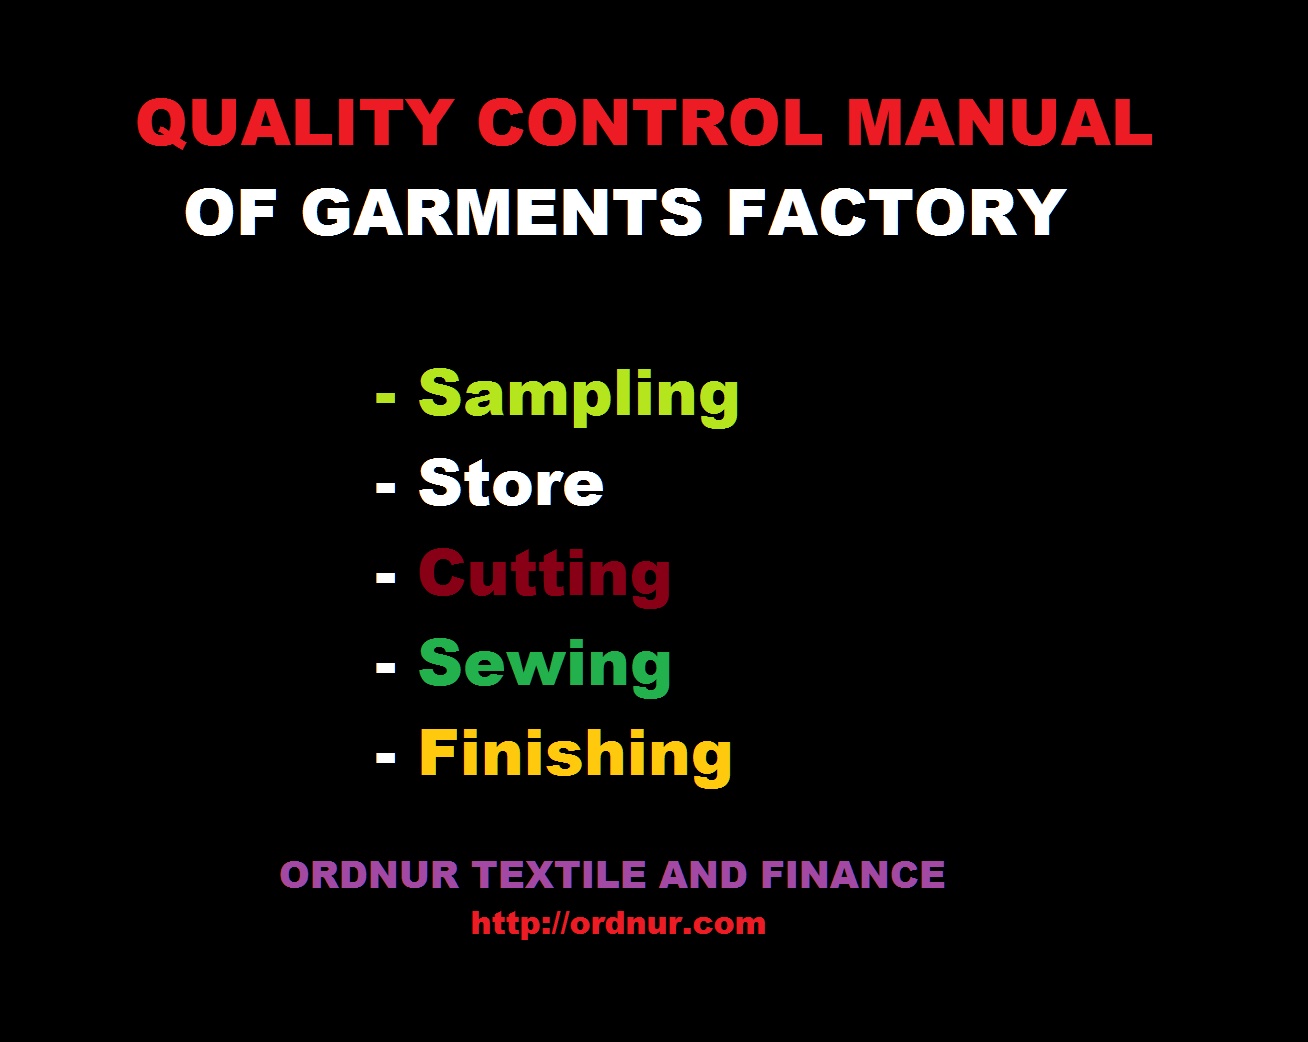
Quality Control Manual of Garments Factory and Its Working Procedure
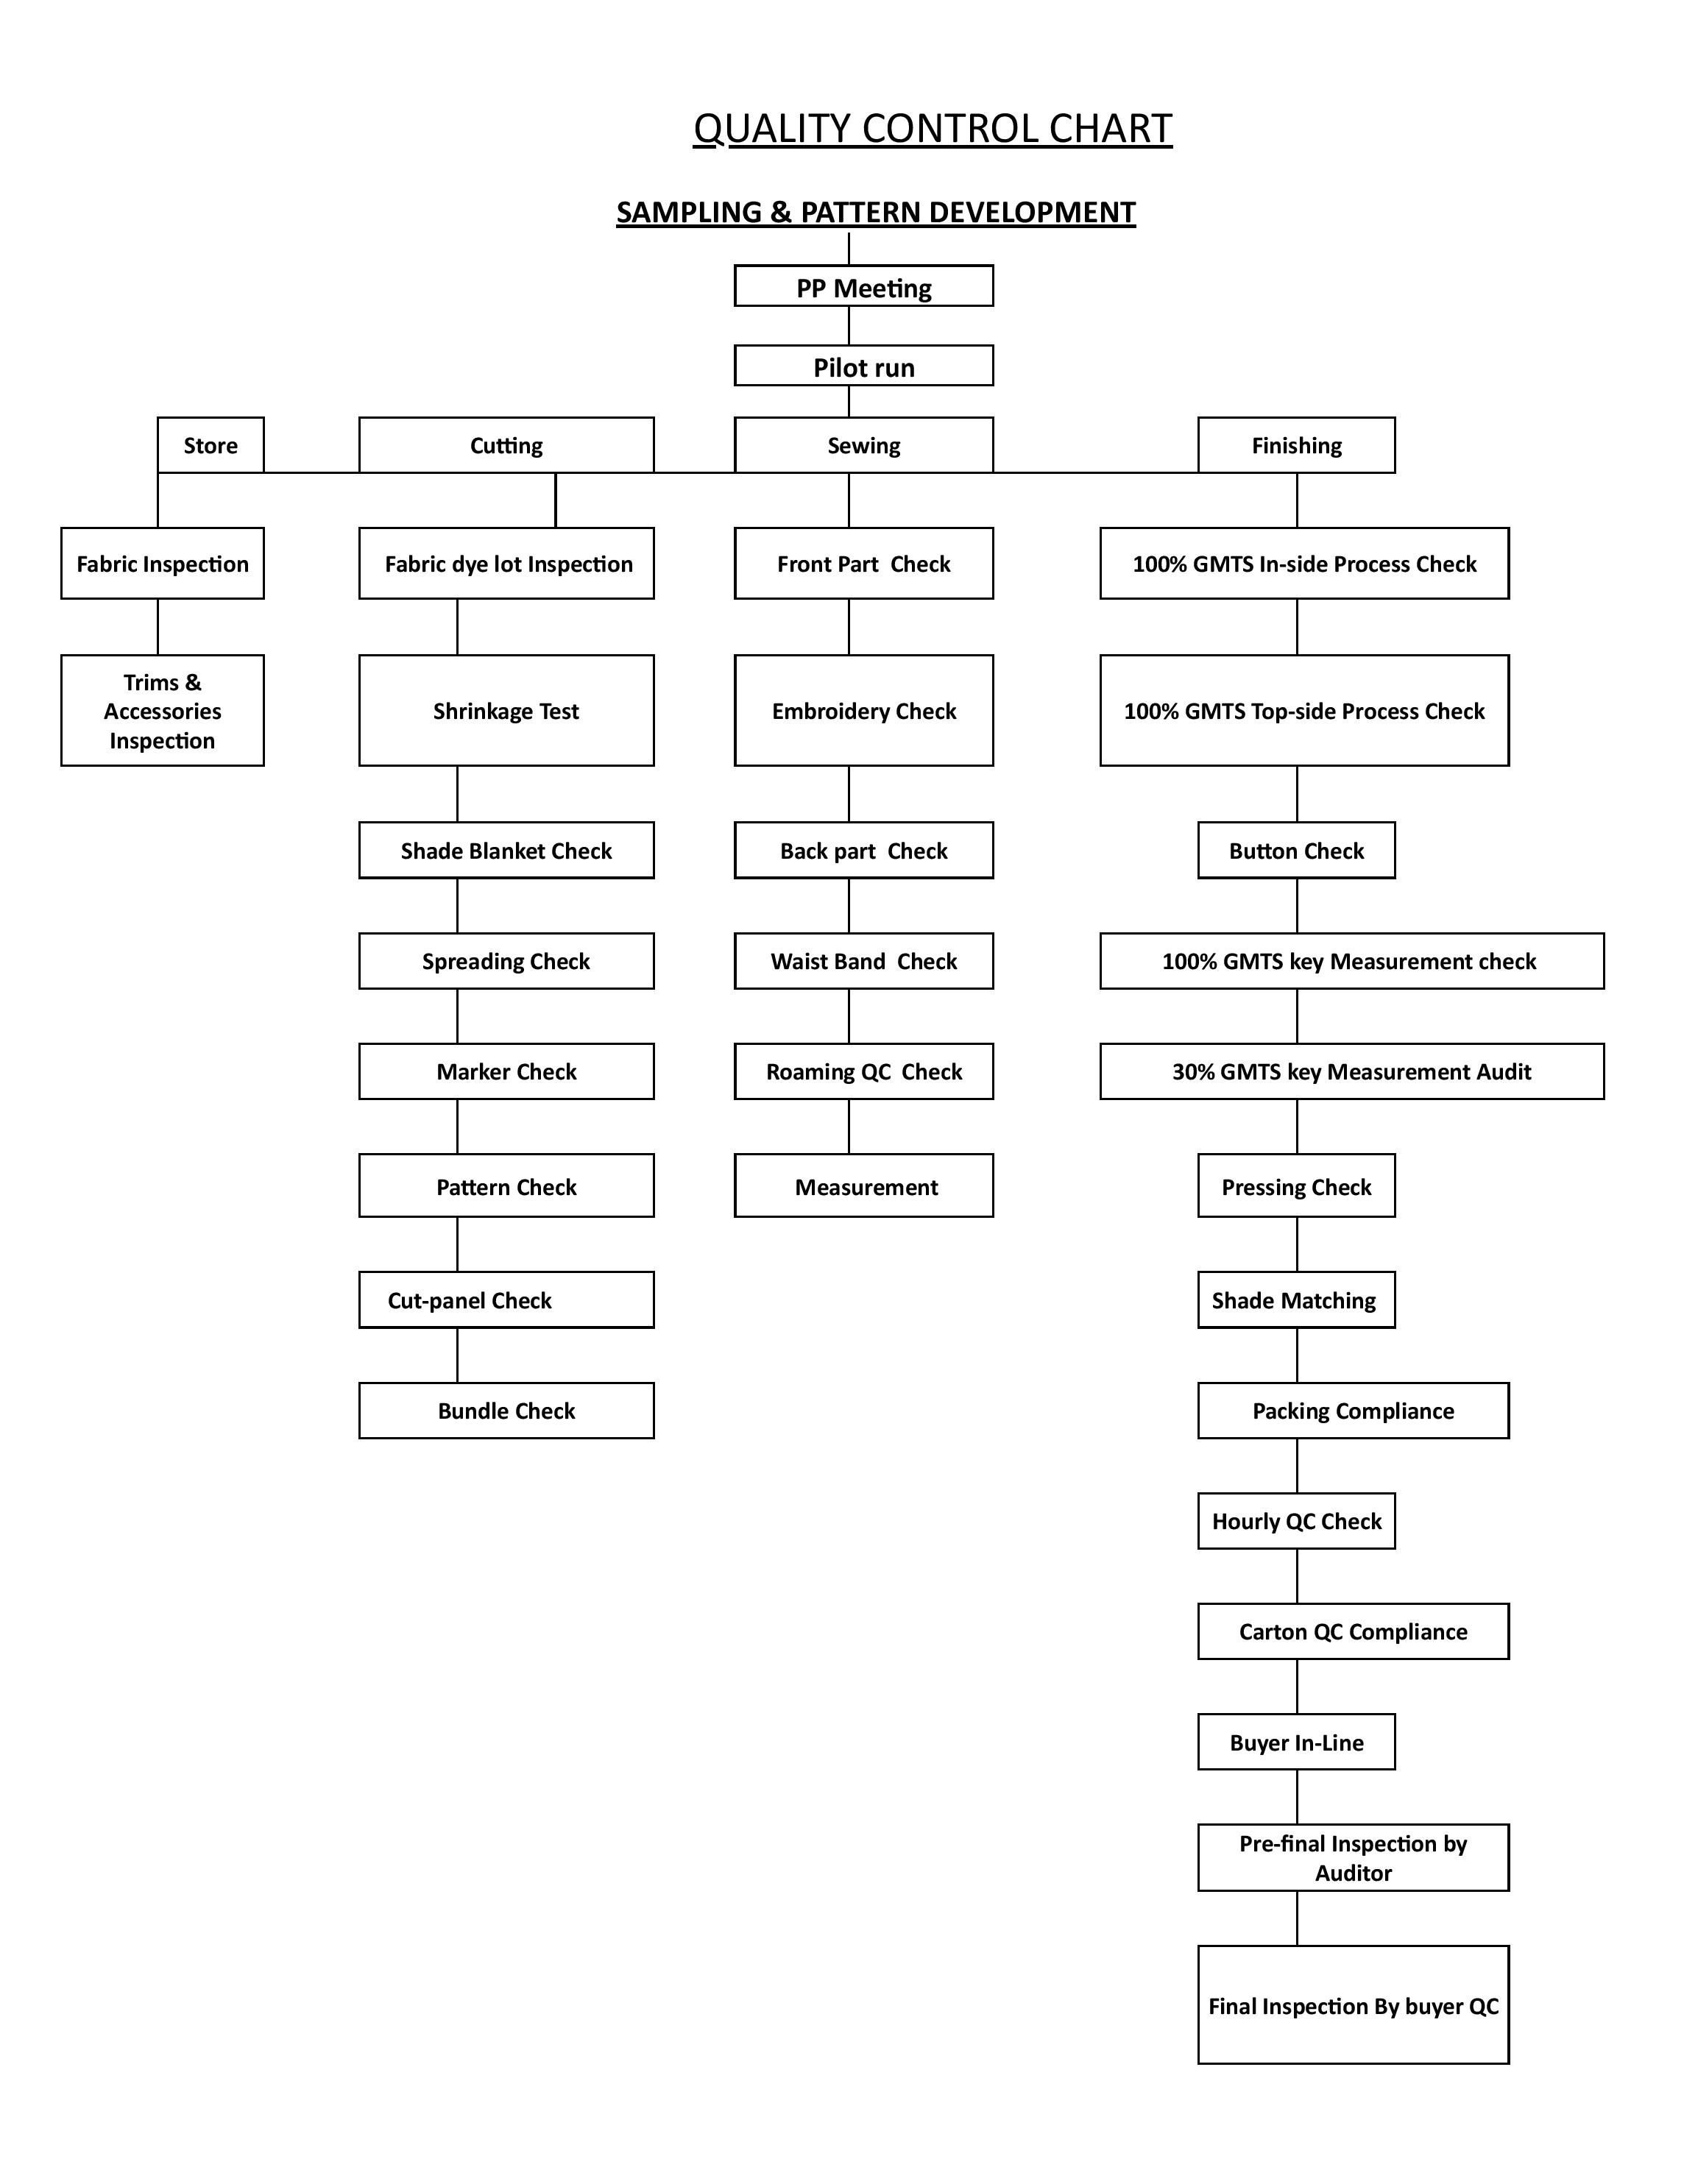 A) Sampling
1. Styling Sample
At first, we need to make a styling sample for getting styling approval as per buyer’s specification, fitting & workmanship. Everything we need to follow as original sample & comments. For styling samples, we give fabric & accessories similar to original color or approved lap dip. We, make a paper pattern of sample size as a buyer requirement. As per styling sample comments, we make the size set pattern.
2. Size Set Sample
Size set sample covering all sizes & covering all sizes & colors. All actual fabric & accessories are used for styling samples. Must adjust the pattern as require fittings, grading, workmanship according to approval specification & comments.
3. Pre-Production Sample (P.P Sample)
For the final configuration of styling fitting & workmanship, before state production we make another size set sample covering all size & color for approval. After receiving p.p sample comments, manufacturer meet all of the buyer requirements, then start bulk production.
4. Counter Sample
In every step of sampling, we kept a counter sample with marking the sample name. The pre-production sample counter should follow with p.p comments for bulk production. We make a copy of the p.p sample with comments to give every line in production.
5. Shipment Sample
The shipment sample has to prepare for buyer 15 days before shipment covering all sizes & colors with all actual accessories. These requirements very buyer to buyer. we always fulfill our buyer’s requirements.
6. Trial Cutting
We cut 60 pcs of garments as a 1st trail to see the measurement. If any correction is required then we do it accordingly. For the safety, we again cut 300 pcs of garments as 2nd trail cutting. After full confirmation, we start bulk cutting.
7. Pilot Run/Size Run
A pilot run is a small cut across all sizes & colors that will identify & potential problems in manufacturing prior to the factory cutting bulk. The inspection of the pilot run should be carried out by the factory Quality Control (QC).
Pilot Lots are Required When
- A new fabric is being introduced and the factory has not handled it before.
- The machine setting must be reevaluated and set accordingly.
- New construction methods are being introduced for critical fit tests.
- New machinery or new settings are being introduced.
- To ensure that shrinkage allowances built into patterns are corrected for steam shrinkage, washing shrinkage, fusing, printing, or any other after treatment to standard.
8. Pre-production Meeting (PPM
The Pre-production meeting should be held to review all aspects of production. It should be held after the PP sample has been approved & sealed. Line managers should attend this meeting which should be facilitated by the production head and attended by the PP sample maker.
The meeting agenda should include style file checklist, production T & A plan, PP sample and comments review, and other aspects of the manufacturing run which could impact garments of the manufacturing run which could impact garment Quality and delivery. The factory’s in-house documentation/is also acceptable.
Criteria for Pre-Production Meetings (PPMs)
(requested when factory received advice of pp sample approval)
- A new fabric is being introduced (including repeat orders)
- Machine setting must be reevaluated and set accordingly
- New construction methods are being introduced for critical fit tests
- New machinery or new setting are being introduced
- To ensure that shrinkage allowances built into patterns are correct for seam shrinkage, washing shrinkage, fusing, printing, or any other after treatment to standard.
- Repeat order of the same season without any change, no need to attend PPM repeat order with changes PPMs need to attend. Repeat order of previous season (no change) need to have pp reference review.
B) Warehouse/Store
1. Accessories Inspection
We inspect 1.5 AQL/10% of accessories as per packing list quantity, by store Q. I we use a quality manual. Q.I checks the accessories quality & safety issue. And write down the information about quality, safety issues & short excess quantity. For that, we can take effective action from the very beginning.
Fabrics Procedure
-
Fabric inspection
We import 10% of fabric as per receiving quantity. we make the fabric lot in various stages, these are like:
- Without Inspection. (Those are not yet starting inspection)
- Inspection running. (Inspection running but yet not finish)
- Quality pass. (That means permitted for cutting)
- Rejected lot. (Not permitted for cutting)
- Held up. (Waiting for a decision from buyer side or supplier)
We inspect fabric by a 4-point system, where 40 points is our acceptable range. Q.C inspects fabric and gives the report. As per the inspection report, we take a final decision. Point rating for inspection is given below:
- 0 to 3″ defects = 1 point
- Over3″ to 6″ defects = 2 point
- Over3″ to 9″ defects = 3 point
- Over 9″ defects = 4 point
- Any hole = 4 point
2. Blanket Making
For every style, it is washed or non-washed, we make a blanket to see the fabric shade & variation of color. We mark rejected roll on that one, which is out of color standard. We divide the toll as per shade wise to ensuring shade wise cutting.
Shade Blanket
Objective
- To find or all shade from bulk fabric for shade band making. Shade band to be made base on the outcome of the shade blanket.
- To evaluate bulk fabric shade before bulk production to ensure all shade lots within an acceptable range
Making Method
- Shade blanket to be made once bulk fabric available in factory
- Each roll of bulk fabric to be cut an 8″(weft) x 6″ (warp) swatch for shade blanket making
- Roll number to be marked on the backside by textile maker pen
- Join all fabric swatches together by overlock stitch then join the left-right side to make a blanket in leg panel form
-
Shade Band
objective
- To set up an acceptable shade range for factory bulk production guidelines.
- To find out shade & solve a problem at the earlier stage before bulk production.
Shade Band Making Method
- Shade band must be submitted before bulk production is started.
- Each shade let me made two sets of leg panels for buyer approval.
- Leg panel dimension is to be (8″half x 16″)
- Whenever the handstand/Ppspray effects are presented in the standard, they should be demonstrated on one side of the leg panels.
- A pocket to be sewn on one side of the leg panel
- Leg panel to be washed the same as the bulk washing
- Achieve shade as close as the washing standard
- Half/Cut leg panels are not acceptable for approval
-
Shrinkage & Distortion Testing
The Objective of Shrinkage Testing
- To determinate bulk fabric shrinkage for paper pattern adjustment to ensure washed garment measurement meets with the size space.
- To determine whether the fabric shrinkage fulfills buyer requirement at the earlier stage before bulk production.
The Objective of Distortion Testing
- To determinate whether the fabric skew movement is fulfilling buyer requirement at the earlier stage before bulk production
- Defect twisted issue before bulk production
Shrinkage Testing Method
- Shrinkage & Distortion testing to be done once the bulk fabric is in-house
- Shrinkage & Distortion testing could proceed with the same template at the same time with the same yardage.
- For normal fabric, a minimum of 10% of bulk fabric is being tested.
- For low stretchability fabric, a minimum of 30% of bulk fabric to be tested.
- For high stretchability fabric 100% of bulk, fabric to be tested
- Please refer to the purchase order to determine bulk fabric is high stretchability fabric or not.
- Specimen for testing to be selected for each dyeing lot.
- 100% test when shrinkage in bulk fabric is unstable. Such as part of fabric shrinkage exceed the tolerance, shrinkage range is too wide in the same lot of bulk fabric.
- The specimen for testing must be fully relaxed before marking.
- Mark two 50 cm x 50 cm squares (Minimum) on specimen’s left, right.
- Specimens must be washed as bulk production; no ironing /pressing/steaming on the washed specimen for the shrinkage test result.
- Measure the length difference between the before wash and after a wash in weft & warp
- Convert in percentage
- Take the average of the 2 parts
- For distortion test result
- Measure the length of diagonal (AC & BD) after wash
- Calculate the percentage by using below formula X =100x[2(AC-BD)/(AC+BD)]
- Show 2 parts results, do not take the average
- None of them can exceed buyer requirement :3%
For Example:
When AC is 70 cm & BD IS 72 cm
X =100x [2(70-72)/ (70+72)]
X =100x [2(-2)/ (142)]
X=100X0.028169
X=-2.8169(Acceptable, with intolerance)
When AC is 73 CM & BD is 69 cm
X=100x [2(73-69)/ (73+69)]
X=100x [2(4)/ (142)]
X=100×0.056338
x=5.6338(Unacceptable, with intolerance)
C) Cutting Inspector’s Instructions
Spreading: The Quality Control inspector should check the work of each spreader for the following
Placement of Marker: Check and verify so that the marker is sited on the range with the brink matching to the selvage of the piece goods. Also, you need to Confirm that all cut pieces will be finished properly.
Shading: A control system should have for checking of shading if all parts are ply marked.
Table Marks: The table is be marked so check the table marks and please do not allow any splices.
Markers: Make sure that there are no makers with creased or overlapped parts in the markers.
Splices: After spreading is finished then check the splice laps that both plies extend past the marked splice by less than 1/2 (half) inch and not more than 1 (one) inch.
Narrow Goods: After completion of the spread, check the “far edge” of the spread to see that all plies extend beyond the marker line.
Tension: Check tension during spreading. This is very important on knit fabrics
Count: Check the count after completion of spreading, and before cutting. Count all plies at both ends. There is no tolerance.
Leaning: Check carefully to ensure that one edge of the fabric is square to the tabletop. Visually inspect the alignment of the edge with the tabletop.
Record spreading defects by the number of defects found for each checkpoint. For fabric utilization purposes, the sample form includes columns for edging end and remnants.
Calculate the defect rate for the spreader by dividing the number of defects found by the height.
Cutting: The quality control inspector should check each cutter at a 2.5 acceptable Quality Level (A.Q.L) based on the number of parts being cut.
The Quality control inspector should check for
Miscut: Check for miscut or the failure of the cutter to “split the line “Tolerance is 1/16” Report all defects for miscut to the cutting foreman (Supervisor)
Matching: Plies check the top ply with the bottom ply. Compare both to a hard pattern or the paper marker Comparison to a hard pattern is best. Tolerance is +- 1/8”. Report each defect found to the cutting foreman(supervisor).
Rugged Cutting: Check for rugged cutting according to the standards for your product. This a judgment defect. It is more important on critical parts if the part has to be recut, it is a defect.
Notches: Check the notch location by placing the pattern over the top ply. Tolerance is +- 1/8″ If the botch is more than 1/8″ off. Contact the cutting foreman (supervisor).
Pattern Check: Compare the pattern to maker paper to ensure that the maker was correct.
Record cutting defects on a cutting quality control form along with the number of bundles examined. To calculate the defect rate for cutting, divide the total defects found by the number of bundles checked.
Often changes are made to patterns to adjust for production problems. Some suppliers note such changes on the pattern and/or maker for the cutter to correct. Do not allow such a policy. Preventive measures are the best control for quality. Make a new pattern with the correction.
D) Sewing
100% in Line Q.I Audit
We follow the root canal system in sewing. For that, we analyze the source & reason for defects and take preventive action as per the root cause. Q.I checks 100% incomplete garments of the quality control manual. Q.I write the operator name & I.D in the format and make that, how many defects she has done in one hour and then one day. And this daily total result is added for monthly summarization for the quality evaluation process. The hourly defects record is very important for root cause analysis. If anyone of Q.C sees the hourly record, he can easily imagine that what is going on & what have to do?
100% End Line Audit
End line Q.I checks 100% garments. Q.I write down the name & ID no of operators & keeps an hourly record of defects. So that we can easily identify the most defective operation and take preventive immediate action. We compare both reports of inline & end line to see the efficiency of Q.C, either he is doing proper work or doing homework.
In-house Q.C Check
An in-house audit is another station audit done by line Q.C we do that for the more safety. When comes first output, Q.C checks the styling & the statistical audit to find out any mistake which has done in sewing. In finishing a section, finishing Q.C will again do the statistical audit to find out any error, which has done in the finishing section. For that, we can solve any problem from the very beginning.
E) Finishing Procedure
After Receiving From Wash
After receiving from wash we start finishing the procedure, at the same time we press covering all sizes & colors to see the measurement, wash standard, hand fill & any wash defect by wash factory. Also, carton & poly, measurement ensure by the first production.
Trimming
Trimming is the most important thing in quality issues. For that, we establish a trimming section to strictly control the uncut thread. We don’t allow tread end over 3 mm. We should take care of trimming throughout the stitching process. Final trimming is done in the finishing area before packing.
Inside Checking
A large quantity of Q.I recon check 100% garments, process-wise in the side of garments. They ensure that no defect & uncut thread inside of the garments. For every Q. I give their personal Q.C pass number inside of the pocket.
Thread Shaking
For removing the loose thread & number sticker garments we use thread shaking machine.100% garments go finishing area through the thread shaking action.
Preliminary Top Side Checking
In finishing section Q.I person check 100% garments, the process-wise top side of garments. They ensure that no defect & uncut top side of the garments. For that every Q.I give their personal Q.C pass no inside of the pocket.
Pressing
We have a gas steam boiler for clean ironing. We use the iron shoe to avoid the shining mark. For perfection, we press a garment two times. One is called preliminary pressing & another is called repressing. This has after final & getup checking.
Final Checking
After preliminary pressing Q., I person check the topside of whole garments. They ensure that no defect, spot & uncut thread top side of the garments. For that every Q. I give their personal Q.C pass no inside of the pocket.
Measurement Check
100% of garments should a measurement check before packing. Measurement defects garments should not advance for packing. Defect means out of tolerance, if it can rectify, it will be pack otherwise it will be count as a reject.
Getup Checking
Q.I check there is something odd looking at a glance in whole garments, like out of shape, spot, poor pressing, and mainly checks any missing of a hand tag price tag, and size tag. And match the barcode number, bar, wording everything with the approval trim card.
Re-pressing
Re-pressing is needed to recovering the damage by Q.C handling. We do this for an attractive outlook.
Metal Detection
There is no perfection to enter any okay garments without metal detector machine checking. We sent all okay garments to the packing section through the metal detector machine. The packing section is isolated by the gatekeeper system. Our detection standard is 1.0 mm diameter sphere of ferrous metal. We keep a 100% record of metal detection.
Ratio & Shade Checking
Before seal, the carton Q.C check the ratio & garments shade that, the ratio & garments shade is as per buyer requirement & same shade in one carton. If both think is okay Q.C gives a sign inside of the carton, then the carton should seal in front of Q.C.
Pre-Final Inspection
There is an in-house pre-final audit for self-confirmation, done by the chief quality controller. He audits by 2.5 A. Q.L as receiving the Q.C pass report we offer for a final inspection. Our A.Q.L chart is shown as bellow.
Hopefully, after reading this you already understand how you can maintain better quality control. If you follow this type of manual and make your own manual for each section of your garments factory then it will be easy for you to ensure quality production.
If you need more guidelines regarding this then please do not hesitate to ask, our comment section is always open for your opinion.
You can download this Complete Quality Manual of Garments Factory

I hope that you won’t stop writing such interesting articles. I’m waiting for more of your content. I’m going to follow you!
Really helpful above Quality control Procedure. thanks…
if you can advice some Self-Evaluation Quality Assurance performance of sweater division, would be of great benefit to me.
Really helpful above Quality control Procedure. thanks…
very good & helpful for us
Quality Control Manual/Material helpful for us.
If you have QC training Material please share!!
very good
I need your quality guideline book, how getting it?
please can uyou send to me a quality control procedure