
Cotton is the most dyed fibre in the world. Every T-shirt, bed sheet and pair of jeans in a bright or deep colour has gone through a dye house first, and most of that colour was applied to cotton using one family of dyes called reactive dyes. Cotton dyeing looks simple from the outside. Fabric goes into water, comes out coloured and the job is done. In the mill, it is a careful chain of steps where a small slip in water, salt, alkali or temperature can ruin a whole batch.
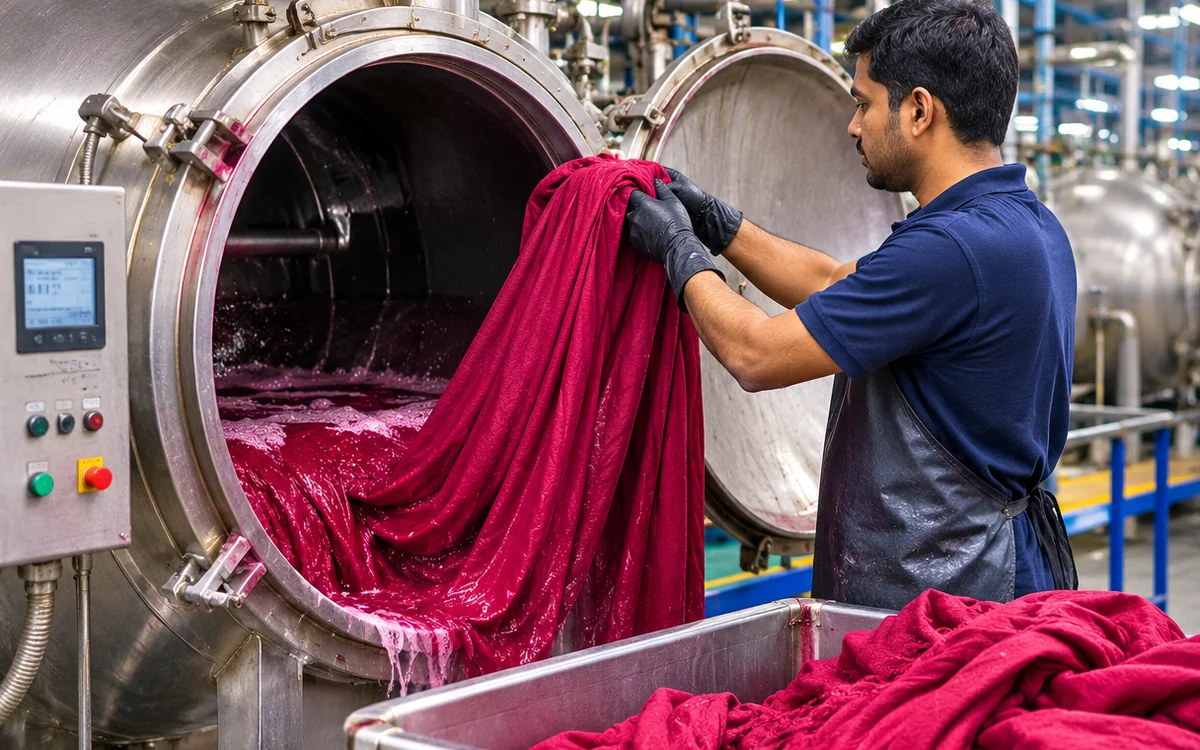
This guide walks through cotton dyeing in plain language. You will learn why cotton needs special dyes, how the fabric is prepared, how the exhaust dyeing process runs from start to finish, what the chemicals do and how to troubleshoot common faults. There is a full worked recipe for 100 kg of knit fabric, with every quantity calculated. For a wider view of dyeing across all fibres, see our guide to the dyeing process in textiles.
Why cotton needs the right dye
Cotton is cellulose, a long chain made from glucose units. It has many hydroxyl (-OH) groups along the chain. In water, cotton fibres swell and carry a slight negative charge. Most dyes in water are also negatively charged. Two negative charges repel each other, so a dye that is not designed for cotton will simply stay in the bath.
Dye makers solve this in a few different ways, which gives us several dye classes for cotton:
- Reactive dyes. They form a chemical bond with the cellulose. Most cotton is dyed this way.
- Direct dyes. They stick to cotton by weak forces and are cheap, but colours are less fast to washing.
- Vat dyes. They are applied in a soluble form and then turned back into insoluble pigment inside the fibre. Very fast colours, used for jeans, workwear and military cloth.
- Sulphur dyes. Low cost, mostly dark shades such as black and navy.
- Azoic (naphthol) dyes. Made on the fibre from two components. Bright reds and oranges.
- Pigments. Not dyes in the strict sense. They are held on the surface by a binder.
Reactive dyes are the leading choice for bright, fast colours at moderate cost. Our page on reactive, disperse and vat dye selection helps you compare them. In the rest of this article, we focus on reactive dyeing, because it is the method used in most cotton dye houses.
Step 1: Preparing the cotton
Raw cotton has natural wax, pectin, seed-coat bits and, in woven fabric, a starch size from weaving. Any of these will block dye from entering the fibre. So the fabric is prepared first.
- Desizing. Removes the starch size from woven fabric, usually with enzymes (amylase).
- Scouring. Removes wax, oils and other impurities with hot alkali.
- Bleaching. Removes natural colour, commonly with hydrogen peroxide. Needed for pale and bright shades. A white base gives cleaner colour.
- Washing and neutralising. Takes out chemicals and brings the fabric to a neutral pH.
Knit fabric is often scoured and bleached in the same machine and the same bath as dyeing, to save time. Good preparation is the single biggest factor for even dyeing. A fabric that absorbs water unevenly will dye unevenly. Our guide to textile pre-treatment chemicals explains each step in more detail.
A simple check is the drop test: place a drop of water on the fabric. If it spreads and soaks in within a few seconds, the fabric is absorbent and ready.
Step 2: Choosing the machine
The dyeing machine depends on the fabric form.
- Jet and overflow machines. Used for knit fabric in rope form. The fabric moves in a circular path driven by a jet of dye liquor.
- Soft flow machines. Gentler version of the jet, for delicate knits.
- Jigger and winch. Used for woven fabric in open width (jigger) or rope form (winch).
- Package dyeing machines. For yarn wound on perforated tubes.
- Pad batch and continuous ranges. For long runs of woven fabric.
Our comparison of jet, jigger and winch dyeing machines sets out the differences. For yarn, read our page on yarn dyeing methods and machines.
Step 3: The exhaust dyeing process for reactive dyes
In exhaust dyeing, the fabric stays in a bath of dye liquor and the dye moves from the bath into the fibre. A typical reactive dyeing cycle for knit cotton looks like this.
- Load and wet out. The fabric is loaded and the bath is filled with water to the set liquor ratio. A sequestering agent is added to bind hard-water metals, along with a wetting agent and sometimes a levelling agent. Our page on sequestering agents explains why this matters.
- Add dye. Dye is dosed gradually at about 40 °C so it spreads evenly.
- Add salt. Salt is added in portions. Salt pushes dye out of the water and into the fibre, which is called exhaustion. It also reduces the repulsion between dye and fibre.
- Raise the temperature. The bath is heated to the dyeing temperature, commonly around 60 °C for hot brand reactive dyes, or 30 to 40 °C for cold brand dyes. Dye migrates and levels out on the fabric.
- Add alkali (soda ash). After salt, soda ash is dosed slowly, often in two or three steps. The alkali raises the pH to about 10.5 to 11. This triggers the reaction between dye and cellulose, called fixation. Adding it too fast can cause patchy dyeing.
- Hold for fixation. The bath is kept at temperature for 45 to 60 minutes, or as the dye maker advises. The dye forms its chemical bond.
- Drain and rinse. The bath is drained. The fabric is rinsed with cold, then hot water.
- Neutralise. A small amount of acetic acid brings the pH back to neutral.
- Soap. Fabric is washed in a hot bath, near 95 °C, with a soaping agent. This removes dye that did not bond with the fibre, called hydrolysed dye. If this step is poor, colour will bleed in later washes and rub off on other clothes.
- Rinse and finish. Final rinses, then a softener and the finishing steps.
The exact settings depend on the dye brand, the shade depth and the machine. Always follow the dye maker’s data sheet.
What each chemical does
| Chemical | Role | Typical amount (guide only) |
|---|---|---|
| Reactive dye | Colours the fibre | 0.1 to 4 percent owf, depending on shade depth |
| Salt (sodium chloride or sodium sulphate) | Drives dye into the fibre | 20 to 80 g/L, depending on shade depth |
| Soda ash (sodium carbonate) | Raises pH and fixes dye | 5 to 20 g/L |
| Sequestering agent | Binds hard-water metals | 0.5 to 1 g/L |
| Wetting and levelling agent | Even penetration | 0.5 to 1 g/L |
| Acetic acid | Neutralises after dyeing | As needed for pH 6 to 7 |
| Soaping agent | Removes unfixed dye | 1 to 2 g/L |
Here “owf” means “on weight of fabric,” so 2 percent owf on 100 kg of fabric means 2 kg of dye. The amounts above are rough ranges for explanation. Actual recipes come from the dye supplier and lab trials.
A worked recipe: dyeing 100 kg of knit cotton in a medium shade
Let us calculate the quantities for a real batch. We choose a medium red shade at 2 percent owf, in a jet machine with a liquor ratio of 1:8. The salt and soda ash amounts are typical values for this depth, used here for demonstration only.
Given
- Fabric weight: 100 kg
- Liquor ratio: 1:8 (8 litres of water for each 1 kg of fabric)
- Dye: 2.0 percent owf
- Salt: 60 g/L
- Soda ash: 20 g/L
- Sequestering agent: 1 g/L
- Wetting and levelling agent: 1 g/L
Step 1: Volume of water in the dye bath.
Water = 100 kg × 8 L/kg = 800 litres
Step 2: Dye.
Dye = 100 kg × 2 ÷ 100 = 2.0 kg
Step 3: Salt.
Salt = 60 g/L × 800 L = 48,000 g = 48 kg
Step 4: Soda ash.
Soda ash = 20 g/L × 800 L = 16,000 g = 16 kg
Step 5: Auxiliaries.
- Sequestering agent = 1 g/L × 800 L = 800 g = 0.8 kg
- Wetting and levelling agent = 1 g/L × 800 L = 800 g = 0.8 kg
Summary of the batch
| Item | Quantity |
|---|---|
| Water | 800 L |
| Reactive dye | 2.0 kg |
| Salt | 48 kg |
| Soda ash | 16 kg |
| Sequestering agent | 0.8 kg |
| Wetting and levelling agent | 0.8 kg |
Notice that salt is by far the largest chemical use, 48 kg for only 2 kg of dye. That is why dye houses watch salt use and why newer dyes that need less salt are popular. You can see how salt and other items add to cost in our page on chemical consumption per kg of fabric.
What happens to the dye?
Reactive dyes do not fix completely. Suppose 75 percent of the dye bonds with the fibre. Then:
- Fixed dye = 2.0 × 0.75 = 1.5 kg
- Unfixed dye = 2.0 × 0.25 = 0.5 kg
That 0.5 kg ends up in the wash-off waters. If the soaping and rinsing steps use 1,600 litres in total, the concentration of unfixed dye in the combined wash water is 0.5 kg ÷ 1,600 L = 0.3125 g/L, or about 312 mg/L, before any mixing with other streams. This explains why dyeing wastewater is strongly coloured and needs treatment.
Fixation values vary a lot between dyes and conditions, from the high 60s to well above 80 percent, so 75 percent is only an example. Reading the technical sheet of your chosen dye is the safe way to plan.
For the effect of water use on cost and effluent, read our guide on liquor ratio and dyeing cost.
Cold pad batch dyeing for woven cotton
Not all cotton is dyed by exhaust. Cold pad batch (CPB) is popular for woven fabric. The steps are:
- The fabric passes through a trough that holds a mix of dye and alkali, usually sodium silicate and caustic soda, and is squeezed by rollers so it takes up a set amount of liquor.
- The wet fabric is wound onto a roll and wrapped in plastic film to stop it from drying.
- The roll is slowly turned and kept at room temperature for 4 to 24 hours, so the dye can react with the fibre.
- The fabric is washed off and soaped in a continuous range.
CPB uses no salt, little water and no heating during fixation. It suits long runs, and it gives good reproducibility. The trade-offs are a need for dosing equipment and a larger minimum batch size.
Dyeing faults and how to fix them
| Fault | Likely cause | Fix |
|---|---|---|
| Patchy or uneven colour | Poor preparation, fast alkali dosing, wrong temperature rise | Check absorbency, dose alkali slowly, control heating |
| Shade differs from the lab dip | Different water, liquor ratio or dye lot | Match lab and bulk conditions, check lot numbers |
| Poor wash fastness | Weak soaping | Better hot soaping, check unfixed dye |
| Dark and light streaks along the fabric | Creases, rope marks, uneven pH | Adjust load, speed and chemical dosing |
| Colour change after storage | Residual alkali or acid | Final pH check |
| Batch-to-batch shade variation | Process differences | Standard recipe and records |
Our guide to shade variation in fabric goes deeper into causes and controls. To check how well the finished colour resists washing, rubbing and light, see our page on colour fastness tests.
Tips for better cotton dyeing
- Test the fabric first. Check absorbency, pH and whiteness before dyeing.
- Use soft water. Hard water metals cause dull or uneven shades. Add a sequestering agent if water is hard.
- Dose in steps. Add salt and alkali in portions, not all at once.
- Control the heating rate. A fast rise can cause uneven dyeing.
- Keep the liquor ratio as low as the machine allows. Lower ratios save water, steam and chemicals. They also raise the dye uptake.
- Soap well. This is the step that decides wash fastness.
- Keep records. Note dye lot, recipe, time, temperature and pH for every batch. This is how repeatable shades are built.
- Shade-match in daylight or a standard light booth. Eyes can be fooled.
Environmental points
Cotton dyeing uses water, energy and salt, and it creates coloured effluent. Mills reduce the impact in several ways: low liquor ratio machines, dyes with higher fixation, recovery of heat from hot effluent, reuse of rinse water, and effluent treatment plants. Some of these ideas also save money, so they are worth a closer look in any dye house.
Final thoughts
Cotton dyeing is a chain, and each link matters. Clean, absorbent fabric, the right dye for the shade and fastness needed, careful dosing of salt and alkali, and a hard-working soaping step all add up to a good result. Our worked recipe showed that a 100 kg batch at 1:8 needs 800 litres of water, 2 kg of dye, 48 kg of salt and 16 kg of soda ash, and that perhaps a quarter of the dye may end up in the wastewater.
If you remember only one rule, make it this one: good dyeing is mostly good preparation and good control. Keep records, follow the dye maker’s sheet and test before bulk.
Frequently asked questions
Reactive dyes are the most widely used for cotton. They give bright colours with good wash fastness. Vat dyes give the best fastness for work wear and denim, and sulphur dyes are used for low-cost dark shades.
Salt reduces the repulsion between negatively charged dye and cotton and pushes dye out of the water into the fibre. This helps the dye exhaust onto the fabric before fixation.
Soda ash raises the pH of the bath so that the dye can react chemically with the cellulose and become fixed. Without alkali, most reactive dyes stay loosely on the fibre and wash out.
The liquor ratio is the weight of fabric compared with the volume of water in the bath. A ratio of 1:8 means 8 litres of water for each kilogram of fabric.
Raw cotton contains wax, oils and other impurities that repel water and block dye. Scouring and bleaching make the fabric absorbent and clean, so the dye can enter evenly.
Soaping is a hot wash with a detergent that removes dye that did not bond with the fibre. It improves wash fastness and stops colour from bleeding.
Yes, with dyes made for cotton, such as home-use reactive dyes or direct dyes, plus salt and soda ash or a fixative. Results are usually less fast than factory dyeing, so wash dark colours separately at first.
