Heat Seal Label: In garments manufacturing it’s called heat seal or heat transfer label which shows the company’s brand logo or other important messages. Heat seal label is very attractive to a customer so its quality should be first class and label attaching process is very sensitive.
Heat Transfer Operation and Guidelines of Garments Manufacturing
Label attach by pressure and heat that’s why it’s called heat transfer Label. In this article, we will have a detail discussion of the Heat Transfer Operation and Guidelines of Garments Manufacturing.
Parameters Influence the Fastness of Heat Transfers
- Temperature
- Pressure
- Time
- Design / placement of artwork
- Quality of glue
- Work requirement before and after heat transfer operation
Guidelines for Heat Transfers
Storage of Heat Transfer Label
- Heat Transfer must be stored in a cool and dry place, away from direct sunlight below 24 C (75 F) and humidity below 70 %.
- As all heat transfers have a shelf life, it is recommended to use heat seal transfer within 12 months from the date of production.
Requirements of the Application Equipment / Heat Transfer Presses
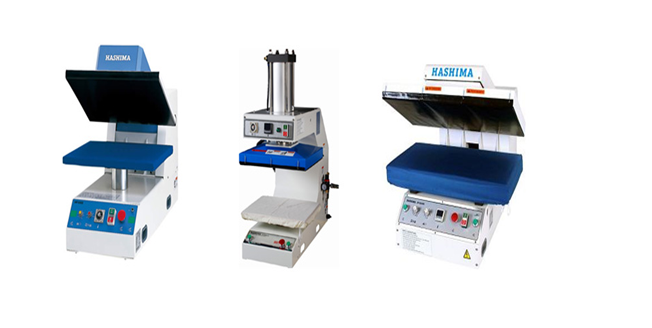
Only automatic pneumatic machines which are able to apply transfers piece by piece must be used.
Roller transfer press machines and manual presses are not accepted, as they cannot guarantee correct and consistent application.
Heat Transfer Presses must have the following features:
- Pneumatically operated with adjustable time, temperature, and pressure.
- Digital microprocessor controller for time and temperature accuracy.
- Fingertip controlled operation and programmable print settings.
- Digital timer, adjustable which shows time countdown on readout, beeps after elapsed time and resets when the handle is raised.
- Consistent, fully adjustable pneumatically pressure control, with pressure range of at least 0 – 7 bar (0 – 100 psi / 0 – 7 kg / cm2)
- Working temperature range of at least 70 – 230 C (160 – 455 F)
- Display Time Range of at least 0 – 180 seconds
- The Head plate should be made of metal and Teflon coated to prevent soiling which could contaminate the garments.
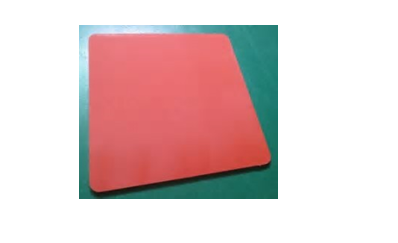
- The base plate must be made of silicon rubber or can be a fleece platform with sufficient resilience to ensure close alignment with the upper heat press platen. A fleece platform is recommended to use for the application of 3-dimensional heat transfer.
- Platen size should be at least 38 x 38 cm (15” x 15 “)
- The plate should be bigger than the artwork.
Machine Height
Heat transfer presses must be adjusted in a way that the operator has an unobstructed view of the application area and is able to quickly identify any problems.
Calibration of the Heat Transfer Presses
H/T machine should be calibrated daily to obtain a reliable and consistent result.
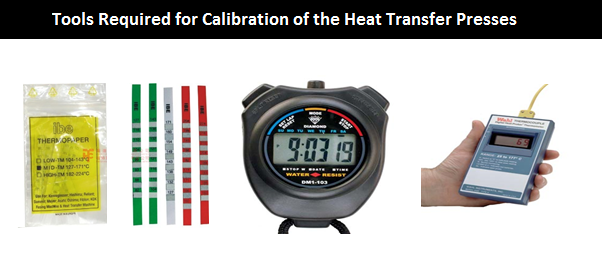
Required Tools Calibration of the Heat Transfer Presses
- Thermocouple or Thermo-labels
- A Stop watch, Cleaning cloth, Machine Calibration Check Log
Machine Inspection
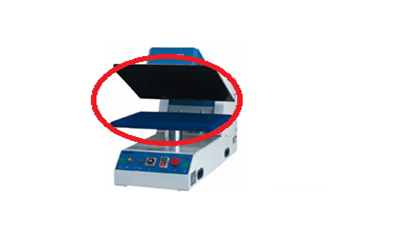
- Head and base plates of the heat transfer presses must be inspected for damage & contamination. The plates must be clean and smooth without any adhesive residue.
- The rubber base plates must be replaced, if it becomes distorted or hard.
Heat Sealing Machine Calibration Check
- Temperature, Pressure and Time must be controlled and documented at a style level.
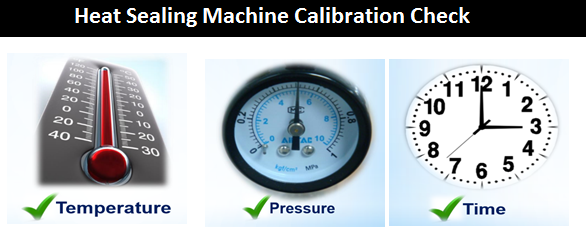
Temperature Check
To ensure that the heat is allocated evenly across the platen and the temperature meter (input temperature) matches the actual output temperature.
- Start the machine and set the Temperature at 160 C, time 30 seconds and Pressure at 3 bar (45 PSI).
- Place 5 Thermo-label set onto the base plate at the upper right, upper left, center, lower left
and lower right position. - Swing the machine onto the position and run a press cycle with
time of 30 seconds. - Remove the thermos-labels and review the darkened labels. Each darkened label represents a temperature that the equipment successfully reached.
- Record the highest temperature reached for each location in the Heat Transfer Machine Calibration Check Log.
- Instead of Thermo-labels, also a Thermocouple can be used to check the temperature.
A temperature tolerance of +/- 3 C is acceptable.- Contact the manufacturer for service if the equipment failed.

The use of a digital temperature control is recommended to have an accurate temperature information.
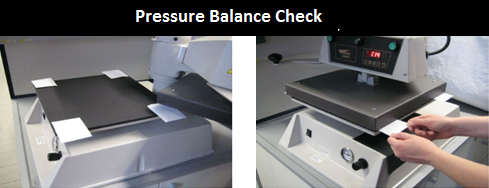
Pressure Balance Check
Test the pressure between the upper and lower plate of the machine
- Place 4 paper strips in same size on top of the base plate.
- Activate the machine to press the strips in between
- Pull the strips sideward with equivalent strength to feel the pressure.
- In case the pressure is uneven and strip pulled out, replace the whole silicon or fleece platform or contact the manufacturer for checking.
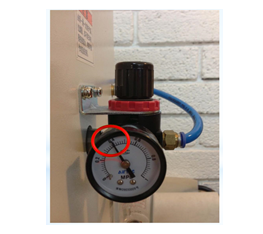
The use of pneumatic pressure is recommended to give a stable pressure.
Time Check
- Set the time of the machine to 30 seconds.
- Put the machine into position and press the start buttons & at the same time start the stopwatch.
- Measure the time for the machine to carry out its cycle.
- Record the time in the calibration log and repeat until 5 cycles are completed.
- Calculate the average and compare log and compare the value to 30 seconds.
- The result should be +/- 0.5 seconds
- If outside this, contact the press manufacturer to reset the timer.
- Record the result in the Heat Transfer Calibration Check Log.
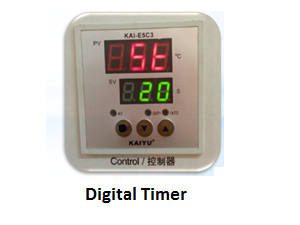
Time should be calculated from the moment of contact between application head and heat transfer.
Heat Seal Transfer Application Procedure and Maintenance Operation Check
Before any operation refer to the heat transfer specifications from the supplier for detailed application directions i.e. Time & Peel Instruction.
- Make sure that the machine has been calibrated before operation start.
- Make sure that the press platens are clean and free of any residue.
- Start the machine and set the temperature, pressure and time which are given by the Heat Seal Transfer supplier application instructions. Allow correct time to heat for newly start machine (morning and after breaks) before bulk production.
- Put the fabric panel over the base plate and place the heat transfer on the desired location of the panel.
- Make sure that the fabric is smooth but not stretched tight.
- Cover a release paper on top of the fabric to avoid direct contact of the heat platen with the fabric.
- Activate the press for one application cycle.
- Some special heat transfer qualities require a second heat pressing process on the reverse side of the fabric. It is crucial to follow exactly the Heat Transfer application instructions.
- Remove the fabric panel from the press and peel off the transparent backing paper as per the application instructions either immediately while the transfer is still hot or after cooling down.
- Do not stack panels until they have fully cooled.
Heat Transfer machines must be checked every 2 hours during print application for correct temperature, pressure and time.
Different positions of the application platform, middle and outer edges should be checked. Result must be documented at the Heat Transfer Application Check Log and displayed at the machine.
Heat Transfer Quality Tests Prior to Production
Development Stage
All heat transfer must be applied and tested on the intended bulk quality. This is to ensure that the die migration, strength of attachment, color change/staining, damage/defects and elasticity can be correctly assessing.
Sample Wash Test
Heat transfer prints on samples must be applied according to the given application instruction. Garment supplier must wash one sample at 40 C (Tumble Dry) to determine problems at early stage. In case the heat transfer on the washed garments shows ay negative appearance regarding color change or peel off, garment supplier must inform heat transfer supplier and immediately discuss further actions. The washed sample and wash test report must be archived by the garment maker and keep for two seasons.
Heat Transfer Supplier Quality Test on Bulk Fabric
As soon as the bulk fabric is available in the factory, garment supplier must send one yard in darkest fabric color to the Heat Seal Transfer supplier for testing.
In case fabrics are delayed, it is the responsibility of the garment maker to inform the Heat Transfer supplier about the fabric code. In that case, the Heat Transfer supplier can arrange the fabric directly from the fabric supplier.
The heat transfer supplier must test on the bulk fabric to identify and confirm the correct application process. Once the washing tests, colour fastness, and migration tests are PASSED, the heat transfer supplier must inform the garment maker supplier about the recommended application instruction.
Garment Supplier Quality test on Bulk Fabric
As soon as the garment supplier receives the confirmed application instruction from the Heat Transfer supplier, garment supplier must
- 10 times washing cycle at 40 C tumble dry
- Color migration test (applied on polyester fabrics)
- Hand Stretch Test to check the
peeling off, cracking problems, removing of application.
The tests must be done on all heat transfer machines which are intended to be used for production. All quality tests must be done after samples are cooled down for at least 24 hours after application. The washing test can be done by the garment supplier if accredited by Buyer. Test can be done by a laboratory which is accredited by Buyer.
In case one of the above test fails, garment supplier must notify immediately the respective heat transfer supplier for further action to solve the problem. The original pass test reports and print swatches (before and after washing) must be available as reference sample at the respective machine print production.
Heat Transfer Quality Check on Printed Panels
100% quality check of the printed panels.
- Before quality check, allow printed panels to cool down.
- Check all edges and corners for solid bond
- Check melting of glue
- Check for color staining / bleeding on the test samples.
- Report any print defects like cracking or peeling-off problems.
- Check bulk output every 2 hours




Need a report format
what is the pre solution for heat seal cracking?