In today’s energy-conscious world, the demand for smarter, faster, and more precise ways to evaluate building performance has never been higher. One of the most powerful tools revolutionizing the way we understand and improve energy efficiency is thermal imaging.
Thermal imaging, also known as infrared thermography, allows professionals to see what the naked eye cannot — temperature differences that reveal hidden energy losses, moisture intrusion, and even potential fire hazards. When integrated into an energy audit, this technology delivers unparalleled insights into the invisible dynamics of heat flow within a building.
Whether you’re a facility manager, a sustainability consultant, or a homeowner aiming to cut utility bills and carbon emissions, understanding the role of thermal imaging in energy audits can be a game changer.
In this article, we’ll take a deep dive into:
- What thermal imaging energy audits are and how they work?
- The benefits and applications across residential, commercial, and industrial settings
- The tools and standards used in these audits
- Real-world examples and actionable insights
- And expert tips to make the most out of your audit
Let’s explore how this cutting-edge technology is helping uncover hidden inefficiencies, boost building performance, and pave the way toward a more energy-efficient future.
What Is a Thermal Imaging Energy Audit?
Understanding the Basics
A thermal imaging energy audit is a specialized assessment that uses infrared technology to detect temperature differences across building surfaces. Unlike traditional audits that rely heavily on manual inspections and surface-level observations, thermal imaging allows auditors to literally see heat — making invisible inefficiencies visible.
At its core, this method involves using a thermal imaging camera (also known as an infrared or FLIR camera) to scan walls, ceilings, floors, electrical panels, HVAC systems, and more. The camera translates thermal radiation into visual images, called thermograms, where warmer areas appear in brighter colors and cooler areas in darker shades. These images help auditors identify energy issues such as:
- Poor insulation
- Air leaks and drafts
- Moisture intrusion
- Electrical overheating
- HVAC inefficiencies
Thermal Imaging vs. Traditional Audits
Traditional energy audits often involve blower door tests, manual checks of insulation, and basic thermal scanning using handheld thermometers. While effective, these methods can be time-consuming and limited in scope.
Thermal imaging transforms the process by providing:
- Non-contact, real-time scanning of large surface areas
- Highly accurate temperature differentials
- Comprehensive, visual data that’s easy to interpret and act upon
This makes it a preferred tool for identifying elusive issues that traditional inspections may miss.
Types of Thermography Used in Audits
There are two main types of thermal imaging used in energy audits:
Passive Thermography
Passive systems rely on existing heat sources (like heating systems or solar gain) to create the required temperature difference between indoor and outdoor spaces. This is the most common approach in building audits.
Active Thermography
In active thermography, an external heat or cold source is applied to stimulate a temperature response. This approach is especially useful in controlled environments or when natural temperature differences are insufficient for effective detection.
When Is Thermal Imaging Most Effective?
For reliable results, audits are usually conducted when there is a significant temperature differential (ΔT) — at least 18°F (10°C) between indoor and outdoor environments. This contrast helps reveal areas where heat is escaping or entering the building.
Winter and early mornings are typically ideal for these assessments, but nighttime summer scans can also work well in hot climates.
Why Use Thermal Imaging in Energy Audits
Thermal imaging has become a go-to tool in modern energy auditing—and for good reason. It enhances accuracy, saves time, improves safety, and empowers better decision-making when it comes to energy-saving investments.
Let’s explore the key benefits in detail.
Non-Invasive Heat Loss Detection
One of the biggest advantages of thermal imaging is its ability to uncover hidden problems without any physical intrusion.
Auditors can:
- Visualize insulation gaps within walls and ceilings
- Identify air leaks around windows, doors, and ductwork
- Spot thermal bridging, where heat transfers through structural components like steel beams
This non-destructive technique eliminates the need to tear down walls or ceilings just to investigate a suspected issue.
Speed and Efficiency
With a thermal camera, large areas can be scanned in just minutes.
Unlike traditional tools that rely on point-by-point temperature readings, thermal imaging provides:
- Comprehensive heat maps in real-time
- Instant identification of problem areas
- Efficient comparison across different rooms or zones
This makes it especially valuable in commercial or industrial settings, where time and access may be limited.
Improved Accuracy and Detail
Thermal imaging provides quantifiable and visual data that supports more accurate diagnoses and reports.
Key metrics such as:
- Surface temperature variations
- Heat transfer patterns
- Temperature deltas across building materials
…help auditors make better-informed recommendations for insulation, HVAC tuning, or sealing work.
Cost-Effective Diagnosis and Prioritization
Thermography enables targeted repairs, meaning clients only fix what needs fixing.
By pinpointing exactly where energy loss is occurring, building owners and managers can:
- Avoid unnecessary upgrades
- Prioritize high-impact improvements
- Maximize return on investment from retrofit or insulation work
This leads to faster payback periods and lower overall maintenance costs.
Enhanced Safety and Preventive Maintenance
Beyond energy savings, thermal imaging plays a critical role in identifying hazards before they escalate:
- Electrical hotspots in panels and wiring
- Overheating components in mechanical systems
- Hidden moisture that could lead to mold or structural damage
By catching these early, facility teams can take preventive action, reducing the risk of fires, breakdowns, or costly repairs.
Environmental & Compliance Benefits
Using thermal imaging supports larger goals like:
- Reducing carbon emissions
- Meeting green building certifications (e.g., LEED, BREEAM)
- Complying with local energy efficiency regulations
Governments and organizations increasingly value technologies that provide measurable energy data, making thermography a strong asset for compliance and sustainability reporting.
Core Applications of Thermal Imaging in Audits
Thermal imaging isn’t just a flashy tool — it serves as a practical, multipurpose diagnostic device across different parts of a building. From detecting invisible energy leaks to identifying potential hazards, its applications are diverse and impactful.
Let’s explore the core areas where thermal imaging delivers value in energy audits.
1. Building Envelope & Insulation Assessment
What It Reveals:
- Missing, compressed, or deteriorated insulation
- Thermal bridging (heat transfer through framing materials)
- Heat escaping through ceilings, walls, or floors
Why It Matters:
Poor insulation is a leading cause of high energy bills. Thermal imaging allows auditors to quickly spot inconsistencies in the thermal envelope — especially in attics, crawl spaces, and exterior walls — without disturbing the building materials.
2. Air Leakage Detection
What It Reveals:
- Drafts around windows, doors, attic hatches, and baseboards
- Leaky duct joints or unsealed penetrations
- Stack effect issues in multi-story buildings
Why It Matters:
Uncontrolled air movement wastes heating and cooling energy and causes occupant discomfort. Thermal scans, especially when combined with blower door tests, make air infiltration visible — allowing for precise sealing with caulk or foam.
3. HVAC and Duct System Evaluation
What It Reveals:
- Temperature variations across ductwork
- Leaky ducts in attics or crawl spaces
- Blockages or restricted airflow zones
- Malfunctioning dampers or coils
Why It Matters:
Even efficient HVAC systems can underperform due to distribution losses. A thermal scan reveals temperature anomalies that help balance systems, increase comfort, and reduce operating costs.
4. Moisture and Mold Detection
What It Reveals:
- Hidden moisture behind walls, ceilings, or floors
- Cold spots caused by water intrusion
- Potential mold-growing areas
Why It Matters:
Moisture problems often go unnoticed until visible damage occurs. Thermal imaging detects cooler areas associated with wet materials, guiding further moisture meter verification. This helps avoid costly mold remediation and structural damage.
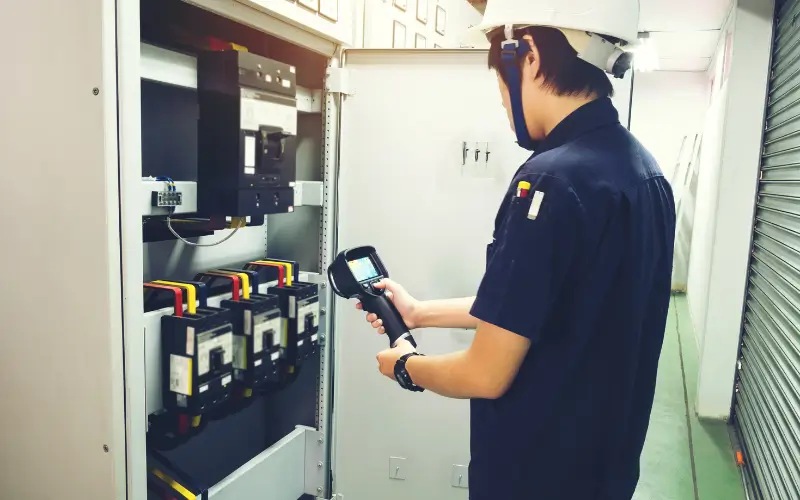
5. Electrical System Inspections
What It Reveals:
- Overloaded circuits and breakers
- Loose or corroded connections
- Failing transformers or fuses
- Unbalanced loads across phases
Why It Matters:
Thermal imaging enhances the safety and reliability of electrical systems by identifying overheating components before they fail. It’s a must-have for preventive maintenance in commercial and industrial audits.
6. Plumbing & Radiant Heating System Checks
What It Reveals:
- Hot water pipe leaks under floors or behind walls
- Cold water pipes sweating or freezing
- Uneven heat distribution in radiant floor systems
Why It Matters:
Water leaks can waste energy, damage interiors, and increase humidity levels. Thermal cameras detect subtle temperature changes around piping, enabling faster repairs and more efficient heating.
7. Roof & Attic Evaluations
What It Reveals:
- Heat escaping through poorly insulated roofs
- Leaks due to moisture or material failure
- Inefficient exhaust fan ducting
Why It Matters:
Attics are notorious for energy loss. Thermal imaging quickly reveals thermal breaches, especially around chimneys, vent stacks, and recessed lighting fixtures — helping guide insulation upgrades.
8. Windows, Skylights, and Glass Walls
What It Reveals:
- Heat transfer through single-pane or damaged glazing
- Air leaks around frames or seals
- Thermal irregularities in curtain wall systems
Why It Matters:
Windows are often the weakest thermal point in a building. Thermographic scans help justify the cost of retrofitting or replacing inefficient glass components.
Together, these applications make thermal imaging a multi-purpose powerhouse that boosts the accuracy and effectiveness of any energy audit — from small homes to high-rise commercial buildings.
How a Thermal Imaging Audit Is Done
Conducting a thermal imaging energy audit is more than just pointing a camera at a wall — it’s a methodical process that combines building science, environmental awareness, and the right tools to produce reliable, actionable results.
Here’s a step-by-step breakdown of how these audits are typically performed.
1. Pre-Audit Preparation
Before any scanning begins, the conditions must be optimized to ensure accuracy.
a. Ensure Proper Temperature Differential (ΔT)
To clearly visualize heat movement, a minimum temperature difference of 18°F (10°C) between indoor and outdoor environments is recommended. For detecting air leaks, even a 3°F ΔT can sometimes suffice, but for insulation issues, the greater the contrast, the better.
Ideal Scenarios:
- Cold outdoor temps with heated interiors (winter)
- Warm outdoor temps with air-conditioned interiors (summer evenings)
b. Prepare the Building
- Close windows and doors at least 30 minutes prior
- Turn off fans or HVAC if necessary to stabilize airflow
- If using a blower door, depressurize the building to enhance air leakage detection
c. Select the Right Equipment
- Thermal camera: Choose based on resolution (min. 160×120), sensitivity (NETD ≤ 0.1°C), and adjustable range
- Moisture meter: To confirm possible water-related cold spots
- Blower door system: For air infiltration studies
- Visual camera or IR fusion system: For side-by-side documentation
2. On-Site Thermal Imaging Inspection
This is where the real magic happens — translating invisible temperature changes into visual thermograms.
a. Systematic Scanning
- Inspect exterior walls, ceilings, floors, windows, and mechanical systems
- Scan both inside and outside surfaces for full perspective
- Move methodically room by room — capturing angles that reveal cold spots, patterns, or bridging
b. Capture and Document Images
- Take both IR images and visible-light photos for comparison
- Note ambient conditions (humidity, temperature, wind)
- Use voice notes or labeling features if available
c. Use Complementary Tools
- Combine results with blower door pressure testing to highlight drafts
- Use moisture meters to confirm suspected wet insulation or leaks
- Where possible, scan during sunrise or sunset to catch dynamic heat shifts
3. Image Interpretation and Analysis
Raw thermographic data must be interpreted carefully to avoid misleading conclusions.
a. Understand Emissivity
- Different materials emit infrared radiation at different rates. A shiny metal surface might look “cold” on the camera, but it’s really reflecting surrounding temperatures.
b. Look for Patterns
Thermal bridging, convection loops, moisture traces, and electrical hotspots all produce distinct thermal patterns.
Knowing these tells you whether you’re looking at:
- Missing insulation
- Air infiltration
- Wet materials
- Equipment overheating
c. Watch for False Positives
- Reflected heat (e.g., from sunlight or appliances) can skew results
- Wind can cool surfaces unevenly, especially outdoors
- Solar loading can warm walls unnaturally during the day
That’s why experienced auditors combine knowledge, context, and sometimes additional testing to verify anomalies.
4. Reporting and Recommendations
- After scanning and analyzing the thermograms, the auditor compiles a report that outlines:
a. Key Findings
- High-resolution thermal images with clear annotations
- Notes on the nature and location of each anomaly
- Supporting metrics: ΔT, humidity, exterior weather, etc.
b. Actionable Recommendations
- Upgrade or repair insulation
- Seal specific air leakage zones
- Repair malfunctioning HVAC or electrical components
- Conduct follow-up testing post-retrofit
c. Visual and Data Integration
Many reports include side-by-side before/after visuals, IR–visible image overlays, and prioritization tables so clients can plan improvements effectively.
Standards, Accuracy, and Limitations
While thermal imaging is a powerful tool in energy audits, its accuracy depends heavily on how it’s used — and under what conditions. Understanding the standards that govern its use, recognizing potential limitations, and avoiding common errors are crucial for producing credible, actionable results.
1. Industry Standards for Thermal Imaging in Audits
Thermal imaging is guided by established technical standards to ensure audits are conducted consistently and accurately. The most recognized include:
a. ASTM C1060 – Standard Practice for Thermographic Inspection of Insulation
- Focuses on detecting insulation deficiencies
- Recommends a minimum 18°F (10°C) ΔT between indoors and outdoors for reliable detection
- Addresses environmental prep, scanning angles, and emissivity considerations
b. ASTM E1186 – Air Leakage Site Detection
- Details how to locate air leakage sites in building envelopes
- Allows use of smoke pencils, infrared thermography, and tracer gases
- Suggests a minimum ΔT of 3°F (1.7°C) for detecting air infiltration
c. RESNET Guidelines for Home Energy Ratings
- Provides protocols for using thermography in residential energy ratings
- Covers camera specifications, operator qualifications, and environmental control
These standards help ensure the thermal imaging process is scientifically valid and can withstand third-party review — especially in certification or legal compliance cases.
2. Factors Affecting Accuracy
Even the best thermal camera can produce misleading results if key environmental or operational variables are ignored.
a. Emissivity
- Definition: The ability of a material to emit infrared radiation
- Issue: Reflective surfaces (metal, glass, shiny paint) can appear artificially hot or cold
- Solution: Adjust the emissivity settings on your thermal imager and apply matte tape or paint to reflective surfaces if needed
b. Reflected Temperatures
- Sunlight, appliances, or even a warm human body can reflect off surfaces and distort readings
- Always conduct audits out of direct sunlight, ideally early morning or evening
c. Wind and Weather Conditions
- Wind can cool surfaces unevenly, especially outside walls
- Rain or snow can mask or alter actual surface temperatures
- Avoid audits during extreme weather unless testing for real-world performance
d. Solar Loading
- Exterior walls exposed to sun will retain and radiate heat, skewing readings
- Avoid scanning sunlit surfaces in the afternoon — opt for early morning or nighttime scans
3. Common Sources of Error
Thermal imaging may be visual and intuitive, but that doesn’t make it foolproof. These are the most common mistakes even experienced users make:
a. Misinterpreting Cold Spots
- Cold areas may suggest poor insulation — or they may be signs of moisture infiltration
- Always verify with a moisture meter before recommending expensive upgrades
b. Overlooking Airflow Patterns
- Thermal patterns caused by drafts or convection currents may look like insulation gaps
- Use blower doors or smoke pencils to confirm air movement
c. Relying Solely on Thermal Data
- Infrared imaging should complement — not replace — other diagnostic tools like duct testers, combustion analyzers, and visual inspections
d. Poor Image Focus or Scaling
Blurry or poorly contrasted images may hide critical details
Use manual temperature scaling to fine-tune image interpretation
4. Operator Expertise Matters
Even with a high-end camera and perfect conditions, results are only as good as the person interpreting them. That’s why certified thermographers or trained energy auditors are preferred for professional assessments.
Look for:
- Level 1 or 2 Infrared Thermography Certification (via ITC, FLIR, or ASNT)
- Field experience across multiple building types
- A clear understanding of building envelope science and HVAC systems
In short, thermal imaging can be highly accurate, but only when used correctly. Following standards and understanding the limitations ensures the results are trustworthy, repeatable, and valuable.
Technologies & Tools Used in Thermal Imaging Audits
A successful thermal imaging energy audit relies not just on one tool, but a suite of technologies working together. From the thermal camera itself to supporting equipment and software, each component plays a role in delivering accurate and actionable results.
Let’s break down the essential tools and their roles in a professional-grade audit.
1. Thermal Imaging Cameras
The centerpiece of any thermographic audit is, of course, the thermal imaging camera. These devices detect infrared radiation and convert it into visual images that display surface temperature variations.
Types of Thermal Cameras:
a. Smartphone-Attached Cameras
- Examples: FLIR One, Seek Thermal
- Compact, budget-friendly, great for small residential assessments
- Ideal for DIY users or home inspectors
- Limitations: Lower resolution, limited thermal sensitivity, and smaller field of view
b. Handheld Professional Thermal Cameras
- Examples: FLIR E8, FLUKE Ti480, Testo 872
- Designed for energy auditors, building scientists, and maintenance professionals
- Features include high-resolution IR sensors, adjustable emissivity, thermal fusion, and built-in image storage
c. Drone-Mounted Cameras
- Used for: Large-scale inspections of roofs, solar panels, industrial facilities
- Provide thermal data from elevated angles or inaccessible areas
- Require remote pilot certification in many regions
2. Key Camera Specifications to Consider
When choosing a thermal camera for energy audits, these specs are critical:
| Specification | Ideal Value / Range | Why It Matters |
| IR Resolution | 160×120 (min), 320×240 or higher (pro) | More pixels = more detail |
| Thermal Sensitivity (NETD) | ≤ 0.1°C | Detects smaller temperature differences |
| Temperature Range | -20°C to 650°C | Needed for HVAC/electrical scans |
| Emissivity Settings | Adjustable | Ensures accurate readings on different materials |
| Focus Type | Manual or auto-focus | Improves sharpness on irregular surfaces |
| IR–Visible Fusion | Optional but useful | Overlay visible photo with thermogram for clarity |
| Wi-Fi / Bluetooth | For syncing with software apps | Simplifies documentation and reporting |
3. Complementary Tools for Accurate Auditing
Thermal imaging is powerful, but when combined with other tools, it becomes precise and diagnostic.
a. Blower Door System
- Purpose: Depressurizes the building to amplify air leaks
- Works hand-in-hand with thermal imaging to visualize airflow paths
- Common in both residential and commercial audits
b. Moisture Meter
- Purpose: Confirms if cold thermal anomalies are caused by water intrusion
- Moist materials often appear colder in thermograms
- Essential for distinguishing between insulation gaps and hidden leaks
c. Laser Distance Measurer
- Helps in estimating insulation area or duct length during scans
- Useful for generating cost estimates and ROI calculations
d. Hygrometer or Humidity Sensor
- Measures relative humidity
- High humidity may impact thermal readings and suggest hidden moisture issues
e. Smoke Pencil or Air Flow Tester
- Used to trace drafts, especially during blower door testing
- Visual confirmation of air leaks seen in thermal scans
4. Software for Image Analysis & Reporting
After capturing thermal images, specialized software allows professionals to analyze, document, and present findings clearly.
Popular Options Include:
- FLIR Tools / FLIR Thermal Studio – Image enhancement, emissivity adjustment, side-by-side visual overlays
- FLUKE SmartView – For annotation, reporting, and scaling
- Testo IRSoft – Reporting suite for Testo cameras
- ThermApp Plus / SEEK App – For mobile-based imaging
Key Capabilities:
- Temperature scaling (manual vs. auto)
- Annotation and labeling of problem areas
- Integration of visible + thermal image overlays
- Export to PDF or cloud platforms
- Voice notes, timestamps, GPS tagging
5. Calibration & Maintenance Tools
- Regular calibration is essential for maintaining accuracy.
- Blackbody Calibration Sources – Used to recalibrate IR sensors to a known temperature
- Lens Cleaning Kits – Dust and smudges can degrade thermal readings
- Protective Cases – To safeguard high-end equipment on job sites
6. Certification and Training Resources
Beyond the tools themselves, skilled interpretation is crucial.
Top Training Bodies:
- Infrared Training Center (ITC)
- ASNT (American Society for Nondestructive Testing)
- FLIR and FLUKE Certification Courses
- RESNET & BPI Training (for energy raters)
Certified training ensures that auditors can:
- Interpret images correctly
- Adjust for emissivity, reflections, and scaling
- Follow safety protocols in electrical environments
Case Studies & Real-World Examples
Thermal imaging isn’t just theory — it’s actively helping organizations and homeowners identify inefficiencies, reduce energy costs, and prevent costly repairs. These real-world case studies demonstrate how impactful thermographic audits can be in practice.
1. Residential Home Audit: Insulation & Draft Detection
- Location: Suburban two-story home, Minnesota, USA
- Problem: High heating bills and cold interior drafts during winter
Audit Approach:
- Conducted during a winter morning (ΔT ≈ 25°F)
- Blower door test paired with thermal imaging
Interior scans revealed:
- Cold streaks along upper wall corners (poor attic insulation)
- Drafts around recessed lighting and window frames
- Missing insulation in garage-ceiling above living space
Outcome:
- Homeowner applied spray foam insulation in key areas and sealed window gaps
- Heating cost dropped by 18% over the next winter
- Comfort improved significantly, especially on upper floors
2. Commercial Office Building: HVAC & Electrical System Analysis
- Location: 6-story office complex, Bangalore, India
- Problem: Frequent HVAC malfunctions and high energy consumption
Audit Approach:
- Used high-resolution FLIR camera with IR–visible overlay
Thermal scans of HVAC ducts and air handlers showed:
- Blocked airflow in east wing ducts due to collapsed internal lining
- Electrical panel in the utility room overheating (loose wiring identified)
- Roof scans revealed solar gain heating uninsulated duct runs
Outcome:
- Duct system repaired and re-insulated
- Faulty breaker replaced before failure
- Utility bills dropped by 14% in summer months
- Prevented potential fire risk from overheating electrical system
3. Industrial Facility: Electrical Load Imbalance & Equipment Failures
- Location: Textile factory, Dhaka, Bangladesh
- Problem: Unexpected downtime due to machinery failure
Audit Approach:
- Night-time audit with industrial-grade FLUKE Ti480 camera
Thermograms showed:
- Abnormal heat signatures in three-phase power panels
- Overheated bearings in spinning machinery
- Inefficient thermal insulation on hot water pipes
Outcome:
- Electrical phases rebalanced to prevent overload
- Predictive maintenance scheduled for failing bearings
- New pipe insulation installed, reducing heat loss by 30%
- Downtime reduced by 40%, improving operational efficiency
4. Multifamily Building: Mold & Moisture Prevention
- Location: 10-unit apartment block, London, UK
- Problem: Persistent mold issues in ground-floor flats
Audit Approach:
- Interior thermal scans on a damp spring morning
- Cold surface spots found behind furniture near exterior walls
- Moisture meter confirmed elevated RH in those zones
- Thermal bridging due to concrete slab construction amplified condensation
Outcome:
- Wall insulation panels and vapor barriers installed
- Residents educated on furniture spacing for airflow
- No mold reports for over a year post-intervention
5. Utility-Scale Deployment: Urban Grid Monitoring
- Location: Mumbai, India – Public Infrastructure Project
- Problem: Frequent power outages and suspected energy theft
Audit Approach:
Mobile thermal imaging units deployed at night
Detected:
- Overloaded transformers and overheating conductors
- Energy siphoning via illegal wiring
- Substation inefficiencies due to aged components
Outcome:
- Faulty transformers replaced
- Unauthorized connections dismantled
- Energy losses reduced by 12%, reliability improved
- City authority cited thermography as “critical for infrastructure modernization”
Key Takeaways from These Case Studies
| Use Case | Impact |
| Residential Homes | Lower energy bills, improved comfort, targeted insulation upgrades |
| Commercial Offices | Safer electrical systems, better HVAC performance |
| Industrial Plants | Preventive maintenance, reduced downtime, energy savings |
| Apartments | Mold prevention, improved occupant health |
| Urban Infrastructure | Grid reliability, theft detection, large-scale efficiency |
These examples show how thermal imaging is not just a diagnostic tool — it’s an investment multiplier, helping identify, prioritize, and verify energy-saving and safety-improving actions.
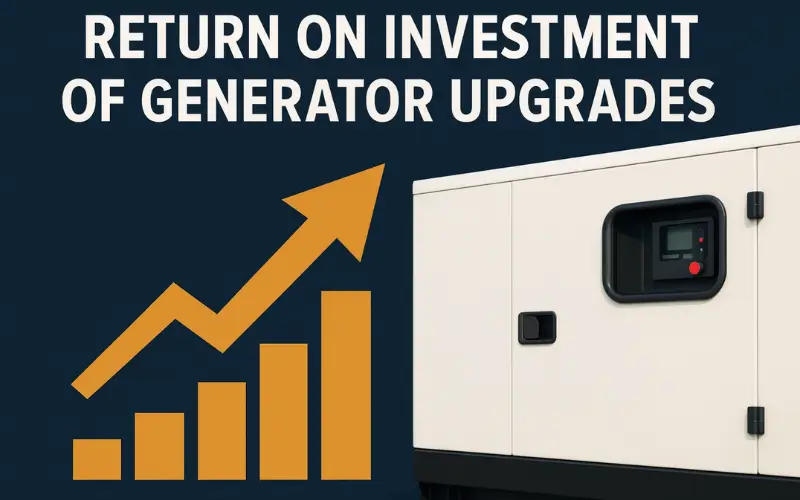
Benefits & ROI of Using Thermal Imaging
Thermal imaging is more than just a high-tech tool — it’s a strategic asset that brings measurable financial, environmental, and safety benefits. Whether used in a home energy audit or industrial maintenance program, the return on investment (ROI) can be substantial.
Let’s explore the broad spectrum of benefits that thermal imaging provides.
1. Precise Energy Loss Identification
Traditional audits may guess where energy loss is happening — thermal imaging proves it visually.
- Pinpoints exact areas of air leaks, missing insulation, or HVAC inefficiencies
- Saves time and effort by eliminating the need for full-blown demolition or trial-and-error diagnostics
- Empowers focused repairs rather than whole-building retrofits
Result: Lower repair costs and faster payback on upgrades
2. Reduced Utility Bills
By addressing the problems identified through thermal imaging, building owners can realize significant utility savings, such as:
- Sealing duct leaks to improve airflow efficiency
- Replacing poor insulation to stabilize indoor temperatures
- Tuning HVAC systems to prevent overworking and energy waste
In most documented cases, thermal audits lead to 10–30% energy savings depending on the building’s initial inefficiency levels.
Result: Monthly cost reductions and improved energy efficiency ratings
3. Enhanced Occupant Comfort
Improved building performance means consistent indoor temperatures, fewer drafts, and better humidity control.
- No more “cold rooms” or “hot corners”
- Reduced temperature swings in multi-story buildings
- Improved satisfaction among tenants, employees, or homeowners
Result: Happier occupants and better indoor environmental quality (IEQ)
4. Increased Property Value and Marketability
Energy-efficient buildings are more attractive to renters, buyers, and investors.
- Buildings with documented thermal audits and upgrades often sell or lease faster
- May qualify for green certifications like LEED, BREEAM, or ENERGY STAR
- Documentation of improvements supports insurance claims, appraisals, and compliance reports
Result: Competitive advantage in the real estate market
5. Proactive Maintenance & Risk Reduction
Thermal imaging helps detect developing issues before they become disasters:
- Overheating electrical panels
- Failing mechanical components
- Water leaks that lead to mold, rot, or electrical hazards
Result: Reduced downtime, fewer emergency repairs, and enhanced facility safety
6. Regulatory and Sustainability Compliance
Thermal imaging supports goals and mandates related to:
- Local building energy codes
- ESG reporting and carbon reduction commitments
- Utility incentive programs and government rebates
- Some jurisdictions even require thermal diagnostics as part of energy benchmarking or retrofit projects.
Result: Easier compliance and access to financial incentives
7. Fast Payback and High ROI
Thermal audits are typically low-cost relative to the savings they generate.
Sample ROI Breakdown:
| Building Type | Audit Cost | Identified Savings | Payback Period |
| Single-family home | $200–$400 | $300–$800/year | 6–12 months |
| Office complex | $1,500–$3,000 | $5,000–$10,000/year | <1 year |
| Industrial plant | $3,000–$10,000 | $15,000+/year | <6 months |
Result: Long-term gains for a one-time diagnostic investment
8. Supports Ongoing Energy Management
Thermal imaging is not just a one-time tool — it can be:
- Reused annually or seasonally to benchmark improvements
- Integrated into ongoing facility maintenance and commissioning programs
- Used for post-upgrade validation to confirm energy savings
Result: Sustainable, data-driven building performance optimization
Best Practices & Tips for Auditors
To get the most out of thermal imaging during an energy audit, professionals must go beyond simply using the tool — they need to use it right. From planning and scanning to analysis and reporting, these best practices ensure accurate results, client confidence, and audit credibility.
1. Schedule the Audit at the Right Time
Thermal imaging depends on temperature differences, so timing is everything.
- Ideal Conditions: Minimum ΔT of 18°F (10°C) between inside and outside
- Best Time of Day: Early morning or late evening (to avoid solar loading)
- Best Seasons: Winter (for heating loss detection) or summer evenings (for cooling loss)
2. Understand Emissivity and Reflectivity
Emissivity:
How efficiently a surface emits infrared energy. Most building materials (drywall, wood, insulation) have high emissivity (≈0.90), while shiny surfaces (metal, glass) have low emissivity.
- Adjust emissivity settings in your camera for accurate readings
- Apply matte tape or paint on shiny surfaces for better results
3. Use a Blower Door for Air Leak Detection
Air leaks are hard to detect under normal conditions. Combine a blower door with thermal imaging to reveal:
- Drafts around windows and doors
- Air leakage at baseboards, electrical outlets, or attic hatches
- Hidden wall cavities where air enters or exits
4. Take Both Thermal and Visual Images
Always capture a visible-light photo alongside every thermal image.
- Helps clients understand context
- Makes reports more credible and clearer
- Useful for long-term documentation and before-after comparisons
5. Scan Methodically and Systematically
Plan your route — don’t scan randomly. Divide the building into zones and:
- Start from the top (attic/roof) and move downward
- Follow walls clockwise in each room
- Note problem areas on a floor plan if available
6. Verify with Supporting Tools
Never rely solely on thermal imaging. Confirm anomalies with:
- Moisture meters (for suspected water damage)
- Hygrometers (to monitor relative humidity)
- Contact thermometers or IR spot meters (for precise temperature confirmation)
7. Calibrate and Maintain Equipment
- Perform regular calibration of your thermal camera (especially before high-stakes audits)
- Clean the lens before every use
- Keep batteries fully charged and carry spares
8. Don’t Over-Interpret Cold or Hot Spots
Thermal images can be misleading without context:
- A cold spot may be an air leak — or a cold-water pipe
- A hot spot may be insulation failure — or just sunlight warming the wall
9. Report Clearly and Visually
Your report should:
- Include annotated IR + visual images
- Use arrows, temperature boxes, and brief explanations
- Group issues by priority: safety → efficiency → comfort
- Offer clear recommendations with cost/benefit considerations
10. Continue Learning and Stay Certified
Thermal imaging is both an art and a science. The best auditors:
- Maintain Level 1 or 2 Infrared Thermography Certification
- Regularly update knowledge of building science and material behavior
- Review new camera models, apps, and reporting software
- Participate in forums, webinars, or case study reviews
Conclusion: The Future of Energy Audits with Thermal Imaging
Thermal imaging has transformed energy audits from a largely manual and assumption-driven process into a precise, visual, and data-rich science. It bridges the gap between what we think might be happening inside a building and what’s actually occurring — behind walls, above ceilings, and beneath floors.
From residential homes and commercial offices to factories and urban infrastructure, thermal imaging reveals energy waste, safety hazards, and performance gaps faster and more accurately than traditional methods. It’s no longer a “nice-to-have” — it’s becoming a standard practice for serious energy professionals.
Why It Matters Now More Than Ever
- Rising energy costs are pushing businesses and homeowners to seek smarter solutions
- Sustainability targets and carbon reduction mandates demand precise, verifiable data
- Advanced imaging tools are becoming more affordable and accessible, even for smaller firms and DIY enthusiasts
- Government programs and green building certifications increasingly encourage or require thermal diagnostics
In short, thermal imaging is more than a tool — it’s a strategic advantage in today’s energy-conscious world.
Frequently Asked Questions (FAQs)
1. What is thermal imaging in an energy audit?
Thermal imaging uses infrared cameras to detect heat differences on building surfaces, helping identify insulation gaps, air leaks, moisture problems, and electrical hotspots during energy audits.
2. How does thermal imaging detect energy loss?
By visualizing temperature variations, thermal cameras reveal areas where heat is escaping or entering a building, highlighting poorly insulated spots or air leakage paths.
3. When is the best time to conduct a thermal imaging energy audit?
The best time is when there is a temperature difference of at least 18°F (10°C) between indoors and outdoors — typically during early mornings, late evenings, or colder months.
4. Is thermal imaging safe for electrical inspections?
Yes, thermal imaging is a non-contact, safe way to detect overheating electrical components, preventing potential failures or fire hazards.
5. Can thermal imaging detect moisture or mold issues?
Thermal cameras can identify cooler areas caused by moisture intrusion, which may indicate mold-prone zones, but verification with moisture meters is recommended.
6. Do I need a professional to perform a thermal imaging audit?
While basic scans can be done with consumer-grade cameras, professional audits require certified thermographers who understand building science and image interpretation.
7. How accurate is thermal imaging for energy audits?
Accuracy depends on proper equipment, environmental conditions, and operator expertise. Following standards and best practices ensures reliable results.
8. Can thermal imaging audits help reduce energy bills?
Yes, by pinpointing exactly where energy is lost, audits help prioritize repairs that often result in 10-30% savings on heating and cooling costs.
9. Are thermal imaging audits expensive?
Costs vary based on building size and audit complexity, but the potential savings and preventive maintenance benefits typically outweigh initial fees.
10. Can thermal imaging be used for ongoing building maintenance?
Absolutely. Regular thermal scans can track improvements, detect new issues early, and support long-term energy management strategies.