Screen printing is one of the oldest and most enduring methods of printing—loved by artists, fashion designers, and commercial printers alike. Often called “silk screen printing” in its earliest form, this technique uses a mesh stencil to transfer ink onto a surface. The result is bold, durable, and versatile prints that can be applied to textiles, paper, ceramics, glass, and even wood.
Unlike many modern printing technologies, screen printing has held its place for centuries because of its simplicity, flexibility, and craft appeal. Whether you are a DIY enthusiast curious about making your own t-shirts, an artist looking for a way to reproduce designs, or simply someone interested in the history of traditional printing, this guide will walk you through the essentials.
In the sections ahead, you’ll discover:
- The origins and history of traditional screen printing.
- The tools, materials, and setup required.
- A step-by-step process to create your own screen prints.
- Common challenges, tips, and advanced techniques.
- The advantages, limitations, and alternatives to this method.
By the end of this article, you’ll not only understand how traditional screen printing works but also feel confident enough to start experimenting on your own.
What Is Traditional Screen Printing?
At its core, screen printing is a stencil-based printing method that pushes ink through a fine mesh screen onto a surface. A stencil (created using a hand-cut design or a photo-reactive emulsion) blocks certain areas of the mesh, so the ink only passes through the open parts to form the intended image.
This technique is called “traditional” screen printing because it relies on manual tools, handcrafted stencils, and direct printing methods rather than digital automation. While modern variations use advanced machines and synthetic meshes, the foundation remains the same as it was centuries ago.
How It Works in Simple Steps
- A design is transferred to a stencil or emulsion on a mesh screen.
- The screen is placed over the printing surface (like fabric or paper).
- Ink is poured onto the screen and pushed across with a squeegee.
- The ink passes through the open parts of the stencil, leaving a print.
Traditional vs. Modern Screen Printing
- Traditional: Manual setup, hand-pulled squeegees, simple UV exposure or hand-cut stencils, used by DIY printers, artists, and craft studios.
- Modern: Automated presses, synthetic mesh, precise registration systems, and faster production runs for commercial use.
Despite the evolution, traditional screen printing remains popular because it is accessible, affordable, and creative—you don’t need industrial equipment to start experimenting.
History & Evolution of Screen Printing
Screen printing has a fascinating history that spans thousands of years and multiple cultures. What began as a simple stencil technique has evolved into one of the most widely used printing methods in the world.
Early Origins in Asia
- China (960–1279 AD): The earliest known use of screen printing traces back to the Song Dynasty. Craftsmen used silk mesh stretched over wooden frames, with hand-cut stencils to block certain areas. This is why the method is still sometimes called silk screen printing.
- Japan: The Japanese developed a more refined version called katagami, where intricate paper stencils were used for printing on textiles such as kimonos. This influenced later Western practices.
Introduction to the West
- Screen printing entered Europe in the 18th century, but it wasn’t until the early 20th century that it gained popularity.
- Advances in photo-reactive chemicals allowed printers to create more detailed stencils, sparking interest among commercial printers.
Rise of Serigraphy as an Art Form
- In the 1930s, artists in the U.S. began experimenting with screen printing as a medium for fine art.
- To distinguish their work from commercial applications, they coined the term “serigraphy” (from the Latin sericum, silk, and graphie, writing).
- The National Serigraph Society was founded in 1938, helping to legitimize screen printing as an art form.
Modern Adaptations
- Over time, silk was largely replaced by synthetic meshes such as polyester, which are more durable and precise.
- Today, screen printing is used not only in art and textiles but also in electronics (printing circuit boards), ceramics, and packaging.
Materials & Equipment for Traditional Screen Printing
To practice traditional screen printing successfully, you’ll need a few essential tools and materials. While professional print shops may use advanced machinery, beginners can achieve excellent results with basic equipment.
Frames & Mesh
Frame: Usually made of wood or aluminum, it holds the mesh tightly.
Mesh (originally silk, now polyester or nylon): The fabric stretched across the frame.
- Lower mesh count (60–110) → best for bold designs and thicker ink.
- Higher mesh count (160–230) → ideal for detailed, fine-line work.
Stencils & Emulsions
- Hand-Cut Stencils: Paper, vinyl, or film cutouts placed on the screen.
- Photo-Emulsion Method: The screen is coated with light-sensitive emulsion and exposed with artwork printed on transparent film. After exposure, unexposed areas wash out, creating the stencil.
Inks
- Plastisol Ink: Thick, durable, sits on top of fabric (common in t-shirt printing).
- Water-Based Ink: Softer finish, eco-friendly, penetrates fibers.
- Discharge Ink: Removes fabric dye and replaces it with pigment.
- Specialty Inks: Puff, metallic, glow-in-the-dark, glitter, or high-density inks for creative effects.
Tools & Accessories
- Squeegee: A rubber blade used to push ink across the mesh.
- Scoop Coater: For evenly applying emulsion to the screen.
- Tape: To block off edges and small pinholes in the screen.
- Flood Bar: Distributes ink evenly before pulling the squeegee.
Exposure Equipment
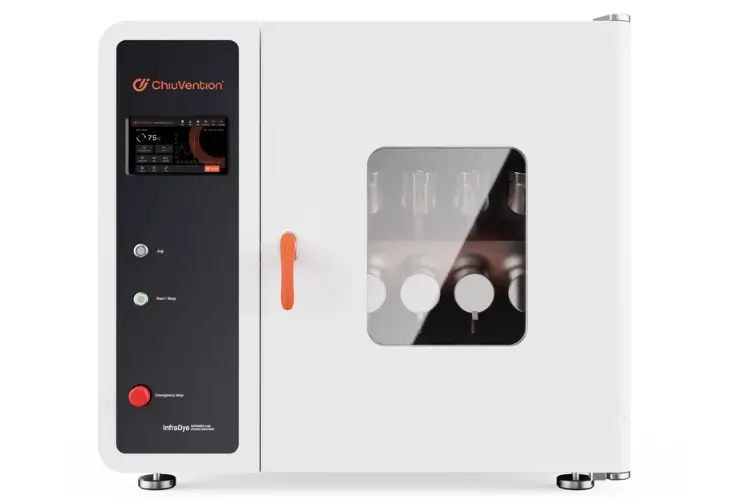
- Light Source (UV Lamp or Exposure Unit): Used for hardening the photo emulsion.
- DIY printers often use sunlight or a simple lamp, while professionals rely on vacuum exposure units for precision.
Cleaning & Reclaiming Supplies
- Emulsion Remover: For stripping old stencils off the mesh.
- Ink Remover & Degreaser: To clean ink residue from the screen.
- Pressure Washer: Helps clear out stubborn emulsion and ink.
Beginner’s Screen-Printing Starter Kit (Checklist with Approx. Costs)
| Item | Purpose | Approx. Cost (USD) | Notes |
| Screen Frame with Mesh (wood/aluminum) | Holds mesh for printing | $20–50 per frame | Higher mesh count = more detail |
| Mesh Fabric (polyester/nylon) | Printing surface | $10–25 per yard | Polyester is most common today |
| Photo Emulsion Kit (incl. sensitizer) | Create stencil using UV light | $25–40 | Needed for detailed designs |
| Transparency Film Sheets | Print your design for exposure | $10–15 per pack | Works with standard inkjet/laser printers |
| Squeegee (rubber blade) | Pushes ink through screen | $15–30 | Different sizes for small/large prints |
| Scoop Coater | Applies emulsion evenly | $20–40 | Essential for smooth coating |
| Inks (Plastisol or Water-Based) | Colored medium for printing | $10–20 per pint | Start with primary colors (CMYK) |
| Light Source / UV Lamp | Exposes emulsion stencil | $30–80 | Can use sunlight as DIY option |
| Tapes & Blockout Fluid | Seal edges/pinholes | $5–15 | Prevents ink leakage |
| Heat Source (Flash Dryer or Heat Gun/Iron) | Cures ink for permanence | $20–150 | Plastisol needs heat curing |
| Cleaning Supplies (degreaser, ink remover, emulsion remover) | Reclaims screens for reuse | $20–40 total | Pressure washer optional but helpful |
| Practice Substrates (t-shirts, posters, fabric scraps) | Surfaces to print on | Varies | Cotton fabric is easiest to start with |
Step-by-Step Process of Traditional Screen Printing
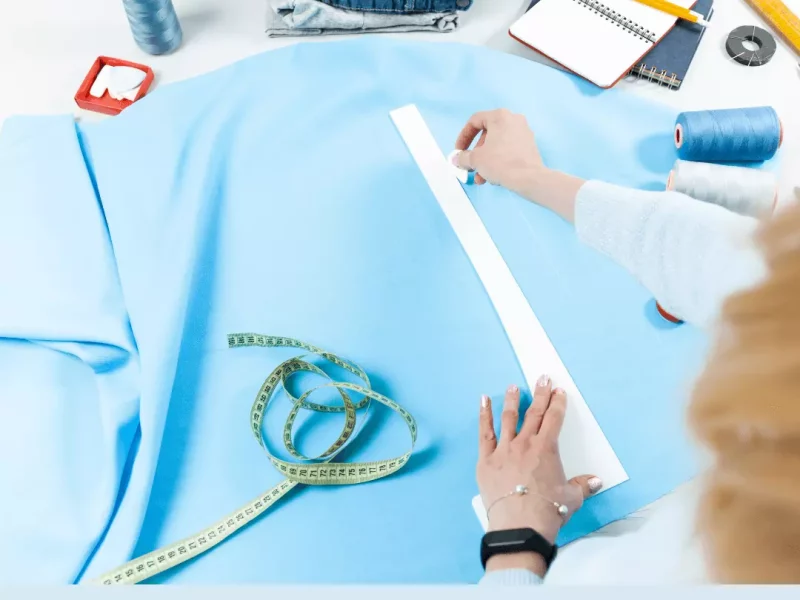
1. Design Preparation
- Create the Artwork: Start with a simple design—bold lines and fewer details are best for beginners.
- Print on Transparency Film: Use black ink so the artwork blocks UV light during exposure.
- Vector vs. Raster: Vector files (e.g., Adobe Illustrator, CorelDRAW) are sharper and scale better than raster images (JPEG/PNG).
2. Screen Preparation
- Degrease the Mesh: Clean your screen with a degreaser and let it dry completely.
- Apply Emulsion: Pour emulsion into a scoop coater and apply thin, even layers on both sides of the mesh.
- Drying: Place the screen in a dark, dust-free area to dry (horizontal position preferred).
3. Exposure & Developing
- Setup: Place your printed transparency on the screen (design side touching mesh).
- Expose to UV Light: Use sunlight or a UV lamp. Light hardens the emulsion around your design.
- Washout: Rinse the screen with water—the unexposed emulsion washes away, leaving your stencil open.
4. Registration & Multi-Color Setup
- For Single Color Prints: Simply tape off edges and place the screen on the printing surface.
- For Multi-Color Prints: Use a registration system (hinge clamps or marks) to align each screen precisely.
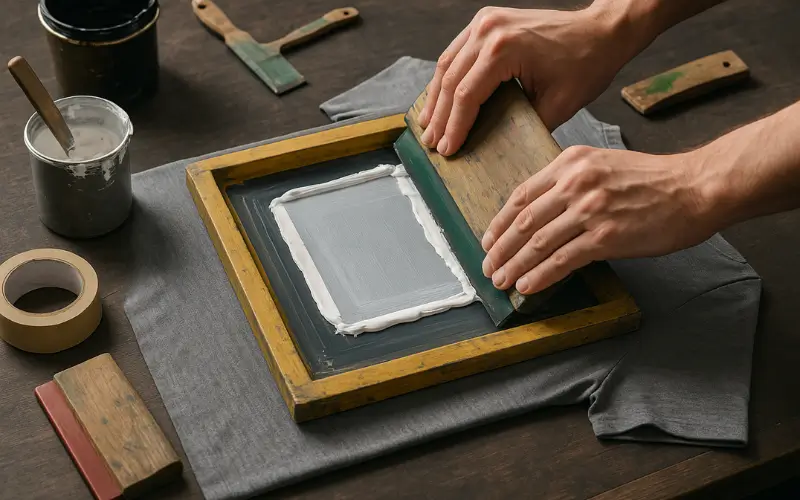
5. Printing
- Flood the Screen: Pull a layer of ink across the screen without pressing down (filling the mesh).
- Print Stroke: Angle the squeegee at 45° and apply firm, even pressure to push ink through the stencil.
- Repeat as Needed: For darker prints, do multiple passes.
6. Curing & Finishing
- Air Dry or Heat Cure: Water-based inks may air dry, but plastisol requires heat curing (320°F / 160°C).
- Heat Sources: Flash dryer, heat press, or even a home iron (with parchment paper on top).
- Check Durability: A properly cured print won’t crack or wash out.
7. Cleanup & Reclaiming
- Remove Ink Residue: Scrape excess ink back into containers and wash screens with ink remover.
- Strip Emulsion: Use emulsion remover and a brush or pressure washer to clean the screen.
- Reclaim for Next Use: Once cleaned, the screen can be reused with a new design.
Applications & Versatility of Screen Printing
One of the reasons screen printing has endured for centuries is its incredible versatility. Unlike many printing methods that are limited to paper or textiles, screen printing can be adapted to a wide range of materials and industries.
1. Textiles & Apparel
- T-Shirts & Hoodies: The most common application. Bold, durable prints that withstand washing.
- Fashion & High-End Apparel: Used for specialty inks (metallic, puff, foil) in designer wear.
- Workwear & Uniforms: Durable prints for branding and logos.
2. Paper & Posters
- Popular among artists and designers for making posters, album covers, art prints, and stationery.
- Offers a handmade, high-quality finish that digital printing often cannot replicate.
3. Glass, Wood, & Ceramics
- Used for decorating mugs, plates, bottles, and tiles.
- Inks can be heat-cured or baked onto surfaces for permanence.
- Popular in craft businesses and industrial decoration.
4. Industrial Applications
- Electronics: Screen printing is used to produce circuit boards, membrane switches, and solar panels.
- Packaging: Logos and designs printed on boxes, plastics, and labels.
- Signage & Displays: Bold prints on metal, plastic, or large-format boards.
5. Artistic & Creative Use
- Many artists embrace screen printing as a fine-art technique (serigraphy).
- Famous artists like Andy Warhol elevated screen printing to high art in the 1960s.
- Today, it remains a favorite medium for DIY art studios and craft workshops.
Advantages & Limitations of Screen Printing
Like any printing technique, traditional screen printing has strengths that make it widely used, and drawbacks that limit its applications. Knowing both sides helps you decide when this method is the right fit.
Advantages of Screen Printing
Durability
- Screen prints last longer than many other printing methods, especially on textiles.
- Inks are thick and resistant to washing, sunlight, and wear.
Vibrant & Opaque Colors
- Inks sit on the surface, producing bold and bright prints—even on dark fabrics.
- Specialty inks (metallic, glow, puff) add creative effects.
Versatility of Surfaces
- Works on fabric, paper, wood, glass, ceramics, plastics, and even electronics.
Cost-Effective for Bulk Runs
- Once a screen is prepared, printing large quantities is quick and economical.
- Ideal for uniforms, merchandise, and promotional products.
Handcrafted Appeal
- Screen printing has a tactile, artisanal quality that digital prints lack.
- Favored by artists and craft enthusiasts for its authenticity.
Limitations of Screen Printing
Setup Time & Effort
- Preparing screens, applying emulsion, and exposing designs can be time-consuming.
- Not ideal for one-off or quick turnaround prints.
Complexity for Detailed Designs
- Very fine details and gradients are harder to achieve without advanced techniques (e.g., halftones).
Cleanup & Space Requirements
- Screens must be washed, reclaimed, and stored.
- Requires space for drying, exposure, and curing.
Environmental Concerns
- Some inks (like plastisol) are not eco-friendly.
- Wastewater from cleaning can cause issues if not managed properly.
Limited Scalability for Small Businesses
- While cheap for bulk, it’s less cost-effective for short runs compared to digital printing.
Troubleshooting & Tips for Screen Printing
Even experienced printers run into problems. For beginners, knowing the most common issues and their fixes can save time, money, and frustration.
Common Screen-Printing Problems & Solutions
| Problem | Cause | Solution |
| Ink bleeding / fuzzy edges | Too much ink or pressure; low mesh count | Use less pressure, finer mesh, and adjust squeegee angle |
| Design doesn’t wash out during exposure | Overexposed screen | Shorten exposure time or use weaker light source |
| Design washes out completely | Underexposure / weak film positive | Increase exposure time, use darker printed transparency |
| Pinholes in stencil | Dust, dirt, or uneven emulsion coating | Work in clean area, use tape or blockout fluid to patch pinholes |
| Uneven prints | Inconsistent squeegee pressure | Practice smooth, even strokes with steady angle |
| Ink not sticking to fabric | Wrong ink type or fabric treatment | Use fabric-friendly inks (water-based or plastisol), pre-wash fabrics |
| Print cracks after washing | Ink not cured properly | Ensure correct curing temperature (320°F / 160°C for plastisol) |
| Screen clogs during printing | Ink drying in mesh | Keep ink moving, flood screen between prints, use retarder for slower drying |
Beginner’s Quick Tips Checklist for Screen Printing
✔️ Start Simple – Choose bold, single-color designs before attempting multi-color prints.
✔️ Use the Right Mesh Count – Low mesh for thick inks and bold designs; high mesh for detail.
✔️ Keep It Clean – Dust or grease on the screen causes pinholes and uneven stencils.
✔️ Test Before Final Print – Always print on scrap fabric or paper first.
✔️ Watch Exposure Time – Underexposed = stencil washes away; overexposed = design won’t open.
✔️ Maintain Consistency – Pull the squeegee at the same angle, with steady pressure, each time.
✔️ Flood Between Prints – Keep ink from drying in the screen by flooding after each stroke.
✔️ Cure Thoroughly – Heat cure plastisol inks to the recommended temperature (around 320°F / 160°C).
✔️ Don’t Rush Cleanup – Clean ink immediately after printing; dried ink ruins screens.
✔️ Stay Organized – Label screens, inks, and tools when running multiple projects.
This quick-reference list makes troubleshooting easier for beginners and helps maintain consistent, professional-quality prints.
Advanced Techniques & Special Effects in Screen Printing
Once you’ve mastered the basics of traditional screen printing, you can explore advanced methods that add detail, depth, and creative flair to your prints. These techniques expand what’s possible beyond simple single-color designs.
1. Halftone Printing
- What it is: Converts photos or gradients into tiny dots of varying sizes, which create the illusion of shades.
- Application: Great for printing photographs or detailed shading.
- Tip: Use high mesh counts (180+) for crisp halftone dots.
2. CMYK Process Printing
- What it is: Uses four colors—Cyan, Magenta, Yellow, and Black—to recreate full-color images (like magazines).
- Application: Best for realistic images, posters, or complex artwork.
- Tip: Requires precise registration and color separation for accurate results.
3. Simulated Process Printing
- What it is: Similar to CMYK but uses custom spot colors (not just CMYK) for better accuracy on dark garments.
- Application: Used for high-quality t-shirt printing with many colors.
- Tip: Works well on black or dark fabrics where CMYK may appear dull.
4. Special Effect Inks
- Metallic & Foil: Add shiny finishes for logos or decorative prints.
- Glow-in-the-Dark: Charges with light and glows in darkness, popular in novelty apparel.
- Puff Ink: Expands when cured, creating a raised, 3D effect.
- High-Density Ink: Builds thick layers for a rubberized, embossed feel.
- Discharge Ink: Removes fabric dye and replaces it with new color, producing soft prints on dark cotton.
5. Overprinting & Layering
- Printing multiple layers of ink can produce unique textures and color blends.
- Popular in poster art and fine art prints.
6. Mixed Media Experiments
- Screen printing combined with embroidery, hand-painting, or block printing creates one-of-a-kind results.
- Favored by independent artists who want unique, collectible pieces.
Comparisons & Alternatives to Screen Printing
While screen printing is a powerful and versatile method, it’s not the only option. Other techniques like digital printing and heat transfer have gained popularity, especially for small runs or highly detailed designs.
Comparison Table: Screen Printing vs. Digital Printing vs. Heat Transfer
| Feature | Screen Printing (Traditional) | Digital Printing (DTG) | Heat Transfer |
| Setup Cost | Medium – requires screens, emulsions, inks | Low – no screens needed | Low – heat press and transfer paper |
| Best For | Bulk orders, bold designs, vibrant colors | Small runs, detailed or photographic designs | Custom single prints, logos, and short runs |
| Print Quality | Very vibrant, durable, thick ink layers | Good detail and gradient reproduction | Good for photos and full-color images |
| Durability | Excellent – lasts through washes, sunlight | Moderate – fades faster than screen prints | Moderate – can crack or peel over time |
| Color Options | Limited per screen; layering required | Unlimited colors (printed like an inkjet) | Unlimited (depends on transfer quality) |
| Surface Compatibility | Works on fabric, wood, glass, plastic, metal | Mostly fabrics (cotton/poly blends) | Mostly fabrics and flat surfaces |
| Eco-Friendliness | Mixed – water-based inks eco-friendly, plastisol less so | Higher waste (ink cartridges, electricity) | Depends on transfer type; often uses plastics |
| Speed of Production | Slower setup, fast for bulk runs | Fast setup, slower per print | Very fast setup and printing |
| Cost Per Print | Low (when printing in bulk) | High (for larger orders) | Low to medium (depends on paper and vinyl) |
| Common Uses | T-shirts, posters, signage, ceramics, electronics | Custom tees, short-run fashion, photography prints | Custom names/numbers, one-off designs, small businesses |
Pros & Cons of Screen Printing (At a Glance)
Pros
- Extremely durable prints (long-lasting through washes & wear)
- Vibrant colors and strong opacity, even on dark fabrics
- Versatile surfaces (fabric, paper, glass, wood, ceramics, plastics, etc.)
- Cost-effective for bulk runs (ideal for uniforms, merch, promotions)
- Creative flexibility with specialty inks (metallic, puff, glow, etc.)
- Handcrafted/artistic appeal valued in fine art and DIY crafts
Cons
- Time-consuming setup (emulsion, exposure, screen prep)
- Not ideal for one-offs or very small runs
- Limited fine detail compared to digital methods
- Messy cleanup and space required for equipment
- Environmental concerns (plastisol inks, wastewater)
- Steeper learning curve for beginners
Summary & Final Thoughts
Screen printing is more than just a printing technique — it’s a craft with centuries of history, blending artistry, tradition, and modern innovation. From its early beginnings in Asia to its rise in Western art and industry, it has proven to be one of the most versatile and enduring printing methods in the world.
By now, you’ve learned:
- The origins and evolution of traditional screen printing.
- The essential tools and materials needed to get started.
- A clear step-by-step process for creating prints.
- The wide range of applications across textiles, paper, ceramics, electronics, and art.
- The advantages, limitations, and alternatives to consider.
- Practical troubleshooting tips and advanced effects for creative printing.
Whether you’re printing a single t-shirt at home, producing posters for an art show, or exploring specialty inks for creative projects, screen printing gives you the power to transform a simple idea into a bold, lasting design.
At its heart, screen printing remains a hands-on, creative process that rewards patience, practice, and experimentation. Start small, learn from mistakes, and embrace the craft — because every print you pull is not just ink on a surface, but a piece of tradition carried forward.
Frequently Asked Questions (FAQs)
1. What is traditional screen printing?
Traditional screen printing is a stencil-based printing method where ink is pushed through a mesh screen onto a surface. It’s called “traditional” because it relies on manual tools and handcrafted stencils, rather than modern digital machines.
2. What materials do I need to start screen printing at home?
You’ll need a frame with mesh, photo emulsion (or stencil), transparency film, a squeegee, inks, a light source, and basic cleaning supplies. Starter kits are available online for beginners.
3. Is screen printing better than digital printing?
It depends on your needs. Screen printing is more durable and vibrant, especially for bulk runs and bold designs. Digital printing (DTG) is better for small orders and detailed, photographic designs.
4. How long do screen prints last?
With proper curing, screen-printed designs can last for dozens of washes without fading, cracking, or peeling. This durability is why it’s preferred for uniforms and merchandise.
5. Can I use screen printing on materials other than fabric?
Yes! Screen printing works on paper, wood, glass, ceramics, plastics, and even electronics like circuit boards. Different inks and curing methods are used depending on the surface.
6. What is the difference between plastisol and water-based inks?
- Plastisol inks: Thick, durable, and sit on top of fabric. Best for bold, vibrant colors.
- Water-based inks: Softer, eco-friendlier, and penetrate the fabric fibers for a natural feel.
7. How do I fix a screen-printing mistake?
- If ink bleeds → reduce pressure or use finer mesh.
- If design doesn’t wash out → shorten exposure time.
- If print cracks → ensure proper curing temperature.
Many mistakes can be prevented by doing test prints first.
8. Is screen printing eco-friendly?
Traditional screen printing can generate waste (plastisol inks, wastewater). To be eco-friendlier, use water-based inks, proper disposal practices, and biodegradable cleaning agents.
9. Can I print multi-color designs with screen printing?
Yes. Each color requires a separate screen, and proper registration is needed to align them. Advanced techniques like CMYK and simulated process printing can achieve full-color results.
10. Is screen printing profitable as a business?
Yes. Screen printing is a profitable business model because setup costs are relatively low, and bulk printing has excellent margins. It’s popular for t-shirt businesses, merchandise, and promotional products.