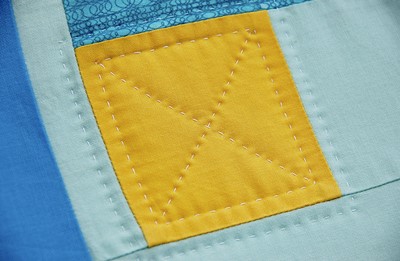
From Sarah: I am hand quilter by necessity. Away at school and determined to make a quilt, I was missing a crucial tool for the process: a sewing machine. Instead, I just quilted it all by hand!
You’ll need a few special tools to get started. It’s important use a hand quilting thread. These threads are often wax coated for strength, stability, and to prevent tangling. (If you choose to use an uncoated thread, you can coat it yourself with quilters’ beeswax.) You’ll want to try using a between needle, which are shorter than many other sewing needles. The shorter needle is important for keeping control over the length of your stitches. A quilting hoop or frame is important to keep all three layers of the quilt sandwich from sliding around while you sew. And finally, you’ll need to choose a thimble. They come in a variety of styles including steel and leather. You may want to try several types to what feels most comfortable to you.
How to Hand Quilt
Before you make your first stitch, you’ll need to make a knot at the end of your thread. I use a quilter’s knot. Start by threading your needle, then laying the last centimeter or two of the thread on your right index finger with the end pointing down. Pinch your needle on top of it between your thumb and index finger, with the point facing away from your hand.
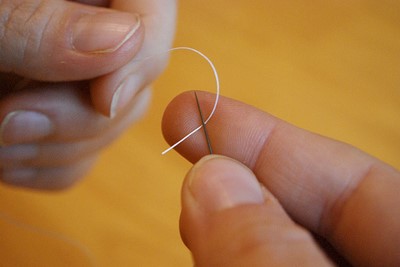
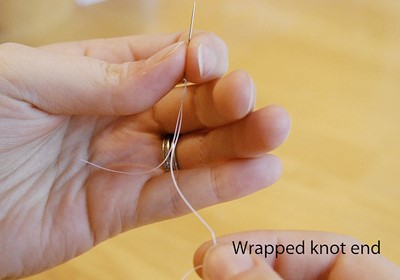
Holding the end of the thread connected to the needle in your left hand 2 inches away from the the pinch and needle, wrap it around the needle, going from front to back 3 to 4 times.
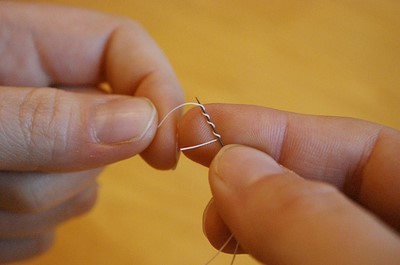
Then, making sure that the end of the thread is on top of the long tail, slide (without releasing your pinch on the end and wraps) your thumb and index finger around the wraps and let go of the thread in your left hand.

Pull the point of the needle with your left hand and keep the knot to be tight in the pinch, until the entire length of the thread has slid through the pinch in your right hand. Give it a little tug, and you have a quilter’s knot.
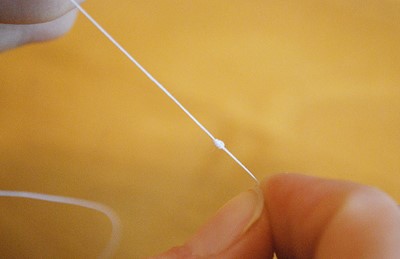
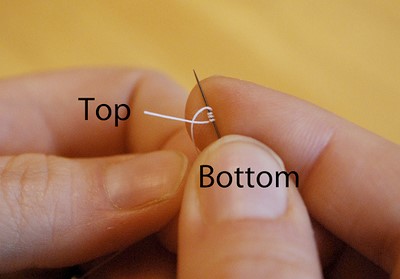
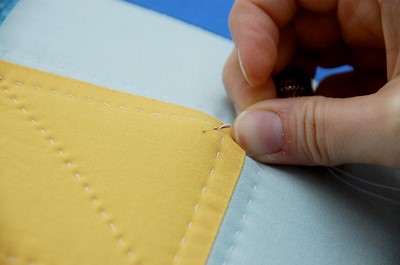
To pop in your thread, insert your needle next to where you want to start quilting, and into the batting. Pull the needle up to where you’ll be starting your stitches at and tug at the knot until it pops into the quilt top. The knot should embed itself into the batting and will secure itself. You’re just about ready to quilt!
(For the next steps, I do things a little unconventionally. Traditionally, quilters are taught to wear their thimble on their middle finger, while gripping the needle with their thumb and index finger and then moving the needle with the thimble only. I always felt awkward holding the needle this way, so I wear my thimble on my ring finger and then grip and move the needle in and out of the fabric with my thumb and middle finger. I believe that as long as it feels comfortable, you should make modifications for your personal preference.)
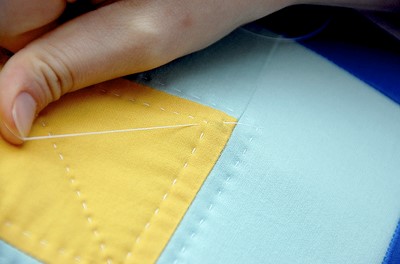
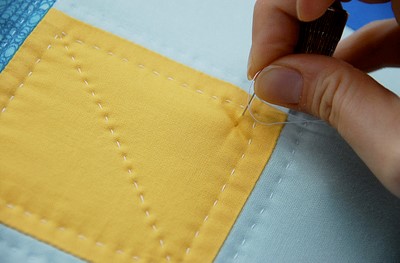
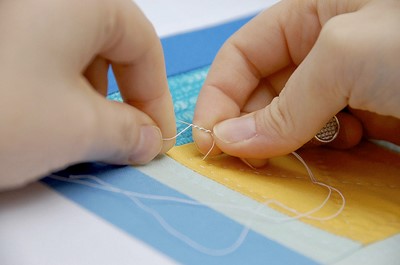
Start by holding the quilting hoop on the arm you are not sewing with and keeping your hand under where you will be sewing at. Place the needle straight up and down, into the quilt sandwich.
Then, without pushing the needle all the way through, push up from underneath the quilt with your thumb and gently rock your needle with your thimble to pick up a new stitch from the bottom.
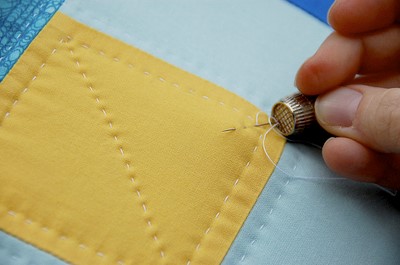
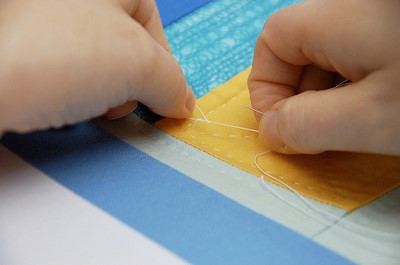
When the tip of the needle shows on the top of the quilt, point your needle back to the starting position of straight up and down and repeat the previous steps.
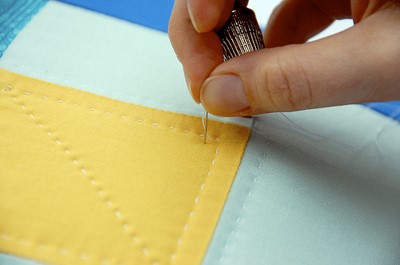
Once you have 2 to 3 even stitches on your needle, push the needle all the way through the fabric with your thimble.
Continue quilting with controlled, even stitches until you are one stitch from where you would like to finish.
You’ll need to make another quilter’s knot to end the line of quilting. Start once again by holding the thread between your finger and needle, and wrap from front to back around the needle 3 to 4 times.
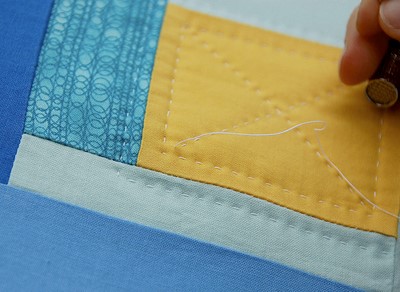
Making sure not to twist anything, gently slide the knot down and tighten about ¼ inch from the last stitch.
Finish off by inserting your needle into the quilt sandwich, pop the knot into the center of the batting and cut the end of the thread. Easy peasy!
If this seems like a lot to think about, just concentrate one or two things at first. Start out by just working on making your stitches all the same length—it will help to make your quilting look neat and tidy. Keep practicing and in no time you’ll be ready to tackle a quilt of your own!